 iVIGA Faucet Manufacturer & Factory

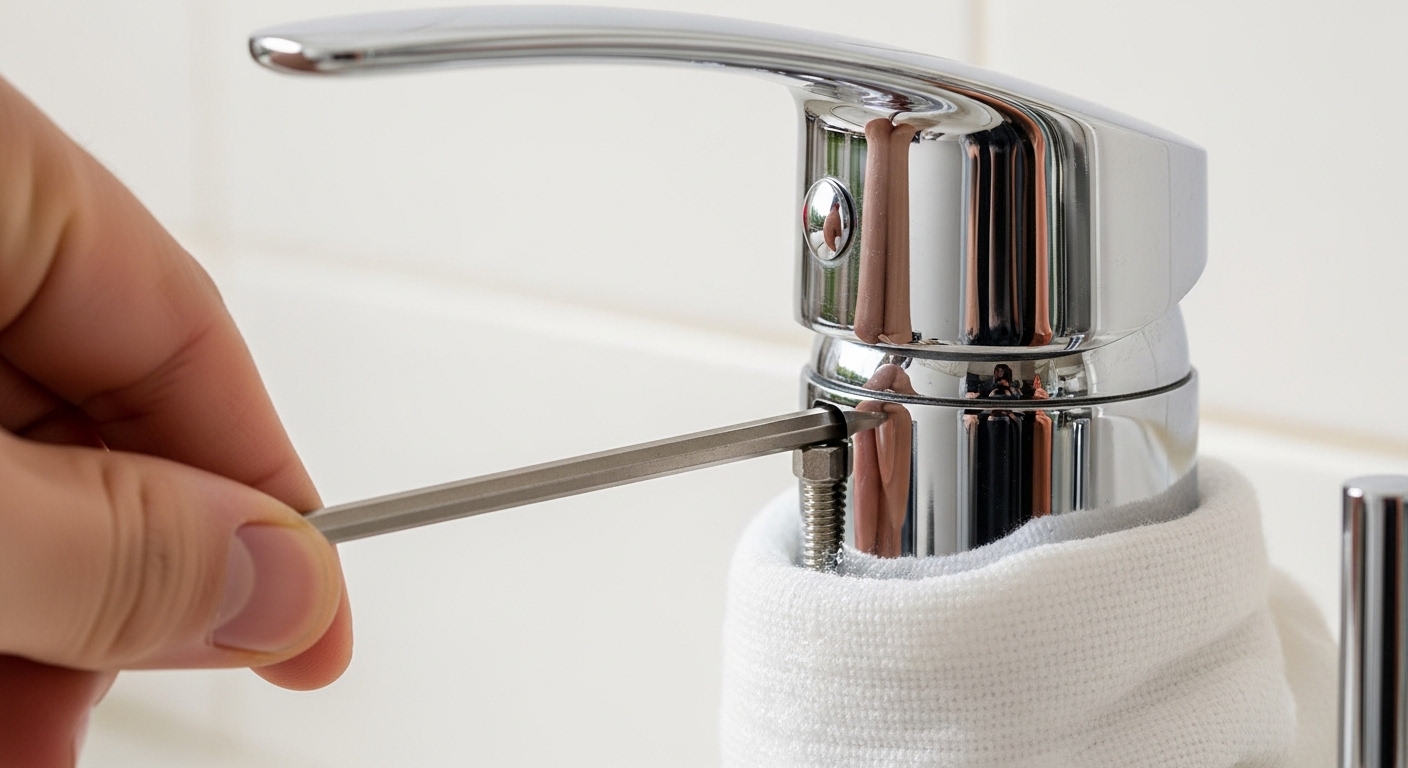
If your faucet handle is cracked, spinning loosely, stripped, or just outdated, a faucet handle replacement is one of the most beginner-friendly repairs in the whole bathroom or kitchen. You’re almost never touching the water lines or the valve body — you’re just swapping the part your hand actually grabs. Below, we’ll walk through exactly how to do it, how to identify the handle you have, what tools you need, and when a stubborn “won’t budge” handle is telling you something bigger is going on inside the faucet.
How do I know if I need a new handle or a new cartridge?
Replace the handle when the problem is the handle itself — it’s cracked, stripped, wobbly, cosmetically dated, or won’t stay tight. Replace the cartridge (the valve inside) when the faucet drips, is hard to turn, or won’t fully shut off, even though the handle looks fine.
This is the single most common mix-up, and it matters because it changes what you buy. The handle is the lever or knob you grip. The cartridge is the sealed valve underneath that actually starts and stops the water. A brand-new handle will not fix a drip — that’s coming from worn cartridge seals. If your faucet is leaking from the spout or the base of the handle, read our guide on how to fix a leaky faucet handle on a kitchen sink first, because you may need to service the valve, not just the exterior part.
- Handle is loose or spins freely: usually just a stripped handle broach or a loose set screw — a handle replacement or re-tighten fixes it.
- Handle is cracked or the finish is peeling: pure cosmetics — swap the handle.
- Faucet drips when off, or is stiff to turn: that’s the cartridge, not the handle.
- Handle came off in your hand: often a corroded set screw or a broken plastic broach inside — replace the handle, and inspect the stem.
What tools and parts do I need for a faucet handle replacement?
You need surprisingly little: the correct replacement handle, a screwdriver or hex/Allen key, and something to loosen mineral gunk. Most jobs use nothing more than that.
Here’s the realistic kit. You almost certainly have most of it already:
- Replacement handle — matched to your faucet brand, model, or handle style (more on matching below).
- Phillips screwdriver — for cap-covered handle screws.
- Hex/Allen key set — the two you’ll reach for most on modern single-lever faucets are 7/64″ and 3/32″.
- Flathead screwdriver or a plastic pry tool — to pop the decorative index cap (the red/blue or logo button).
- White vinegar + an old rag or toothbrush — to dissolve lime and calcium that “glue” a handle to the stem.
- Penetrating oil — for a seized set screw that won’t back out.
- Plumber’s grease — a dab on the stem makes future removal easy.
How do you actually replace a faucet handle step by step?
Turn off the water, remove the cap and screw, pull the old handle straight off, slide the new one on, and re-tighten the screw. That’s the entire job — here it is in detail.
- Shut off the water. Even though you rarely open the valve, close the two supply stops under the sink (turn clockwise). No stops? Shut off the main. Then open the faucet to release pressure. This protects you if a stem lets go unexpectedly.
- Plug the drain. Handle screws and set screws are tiny and love to vanish down the drain. A rag in the basin or a closed pop-up saves you a real headache.
- Remove the decorative cap. On many two-handle bathroom faucets, the hot/cold or logo button pops off with a fingernail or a plastic pry tool, revealing the Phillips screw underneath. Single-lever faucets usually hide a hex set screw on the underside or back of the lever — no cap.
- Remove the screw. Back out the Phillips screw or loosen the hex set screw (7/64″ or 3/32″ are the usual suspects). You only need to loosen a set screw, not fully remove it.
- Pull the handle straight up and off. Wiggle gently, pulling straight — not sideways. If it’s stuck, wrap a vinegar-soaked rag around the base for 10–15 minutes to dissolve the mineral crust, then try again.
- Inspect the stem/broach. Look at the splined stem the handle grips. If it’s chewed up or corroded, that’s why the old handle was loose — clean it, or note it if a stem repair is needed.
- Slide on the new handle. Line up the broach (the splined pattern) and press it straight down onto the stem. With a single-lever, set it to the “off” position first so alignment reads correctly.
- Re-tighten and cap. Snug the screw — firm, not gorilla-tight, or you’ll strip it. Snap the index cap back on. A dab of plumber’s grease on the stem now makes the next swap effortless.
- Turn the water back on and test. Open the stops slowly, run hot and cold, and check that the handle feels solid with no wobble and no drip at the base.
For bathtub and shower handles specifically, the removal can be trickier because of deep-set stems and wall escutcheons — our walkthrough on how to remove old bathtub faucet handles without damaging the wall covers the puller tools you may need for those.
How do I match a replacement handle to my faucet?
Match by brand and model number first; if you can’t find those, match by the handle’s mounting style and the broach (spline) pattern where it grips the stem. A handle that fits the broach and the screw type will work even across some brands.
Universal handles exist, but “universal” really means “fits several common broach patterns,” not “fits everything.” Here’s how the main mounting types compare so you buy the right one the first time.
| Handle mount type | How it attaches | Common on | Best matched by |
|---|---|---|---|
| Set-screw lever (broach) | Hex set screw clamps onto a splined stem | Modern single-lever kitchen & bath faucets | Broach spline count + set-screw size |
| Top-screw with cap | Phillips screw hidden under an index button | Two-handle bathroom faucets | Brand/model number |
| Broach-fit knob | Presses onto a fine-spline stem, secured by screw | Older widespread & tub faucets | Spline count (e.g., 16, 20, 24-point) |
| Cross / lever w/ adapter | Handle plus an adapter sleeve for the stem | Vintage and cross-handle styles | Adapter kit for your stem |
Quick tip: photograph the old handle, the stem, and any printing on the faucet base or under the sink before you shop. If your faucet has a known brand like Kohler, the model-specific handle is the safest bet — our guide on how to replace a bathroom faucet Kohler model yourself shows how brand part-matching works in practice. And if you’re deciding between an all-new faucet versus repairing an old dripper, why a widespread faucet drips and whether to repair or replace it is worth a read before you spend.
My faucet handle won’t come off — what now?
A stuck handle is almost always mineral buildup or a corroded set screw, not a design that requires force. Soak the base in white vinegar, apply penetrating oil to the screw, and if needed use a handle puller — never crank it sideways or you’ll crack the handle or bend the stem.
Work through these in order before you resort to force:
- Vinegar soak. Wrap a vinegar-soaked cloth around the handle base for 15–30 minutes. Calcium and lime are the usual culprits, and mild acid dissolves them without harming chrome or brushed finishes.
- Penetrating oil on the set screw. If the screw is frozen, a drop of penetrating oil and a five-minute wait beats stripping the screw head. Use the exact-size hex key — a slightly small key rounds out the socket instantly.
- Rock, don’t twist. Gently rock the handle up while pulling straight. Sideways yanking snaps zinc handles.
- Use a handle puller. For deep tub/shower stems, an inexpensive faucet handle puller grips and draws the handle off evenly without wall damage.
- Heat, as a last resort. A hair dryer’s warmth can expand a metal handle just enough to break a mineral bond.
How much does a faucet handle replacement cost, and is it worth doing yourself?
Doing it yourself costs roughly $8–$40 for the handle and maybe $10 for a hex-key set — versus $100–$250 if you call a plumber, most of which is a minimum service-call fee. For a job that takes under 40 minutes with basic tools, DIY wins for almost everyone.
Here’s the honest cost breakdown so you know what you’re weighing:
| Approach | Typical cost | Time | Best for |
|---|---|---|---|
| DIY, exact-match handle | $8–$40 | 20–40 min | Most people; loose, cracked, or dated handles |
| DIY, handle + new cartridge | $25–$70 | 45–75 min | Handle swap that also fixes a drip |
| Plumber service call | $100–$250 | Scheduled visit | Seized valve body, wall-set shower handles, no shutoffs |
The main reasons to call a pro: the stem itself is broken off inside the wall, there are no working shutoff valves, or a tub/shower valve body is corroded to the point the whole cartridge won’t move. In that case you’re into ceramic disc vs. ball valve cartridge territory — a different repair from a simple handle swap, and worth understanding before you buy parts.
How do I keep the new handle from getting stuck or loose again?
Put a thin film of plumber’s grease on the stem before installing, don’t over-tighten the screw, and wipe the handle dry after use in hard-water areas. Those three habits prevent 90% of repeat problems.
Loosening usually comes from an over-torqued screw slowly backing out, or a worn broach. Sticking comes from mineral buildup creeping between handle and stem over the years. Plumber’s grease solves both — it blocks minerals and lets the handle seat cleanly. In hard-water homes, an occasional vinegar wipe on the handle base keeps lime from cementing things in place. A snug (not crushing) screw and the right finish care go a long way toward never repeating this repair.
FAQ
Can I replace just the faucet handle without replacing the whole faucet?
Yes. In the vast majority of cases you can replace only the handle. The handle is a separate part that attaches to the valve stem, so as long as you match the broach pattern and screw type, you can swap it without touching the faucet body, spout, or supply lines.
Do faucet handles fit all brands, or do I need a brand-specific one?
Some universal handles fit multiple common broach (spline) patterns, but they’re not truly universal. The safest match is a brand- and model-specific handle. If you don’t know the brand, match the spline count on the stem and the set-screw size, and confirm the mounting style before buying.
Why does my faucet handle keep coming loose after I tighten it?
Usually the set screw is backing out because it was over-tightened and stripped, or the handle’s internal broach is worn and no longer grips the splined stem. Try a new set screw first; if the handle still spins, the handle broach or the stem is worn and the handle needs replacing.
What size Allen wrench removes a faucet handle set screw?
On modern single-lever faucets, the two most common sizes are 7/64″ and 3/32″. Some older or imported faucets use a 2.5 mm or 3 mm metric key. Always use the exact-fitting key — a size that’s slightly too small will round out the set screw and turn an easy job into a hard one.
Should the faucet be on or off when I install the new handle?
Set a single-lever faucet’s stem to the fully “off” position before pressing the new handle on, so the lever’s up/down and left/right orientation reads correctly once installed. For two-handle faucets, orientation is symmetric, so it doesn’t matter — just line up the broach and tighten.
How long does a faucet handle replacement take for a beginner?
Plan on 20–40 minutes for a first-timer, including shutting off the water and cleaning any mineral buildup. If the handle is severely corroded onto the stem and needs a vinegar soak or a handle puller, add another 15–30 minutes of soak time.
Author note: This guide was written by the vigacc fixtures team, drawing on hands-on installation and repair experience across kitchen, bath, and tub faucets. At vigacc (www.viga.cc), we design and test faucets and replacement components to meet recognized plumbing standards for lead-free wetted surfaces and durability, and we back our fixtures with a manufacturer warranty. Handle broach patterns, set-screw sizes, and cartridge fit are checked against real-world faucet models so the parts you order actually fit the faucet you own. Always confirm compatibility with your specific model before purchasing a replacement part.
WeChat
Scan the QR Code with WeChat