 iVIGA Faucet Manufacturer & Factory

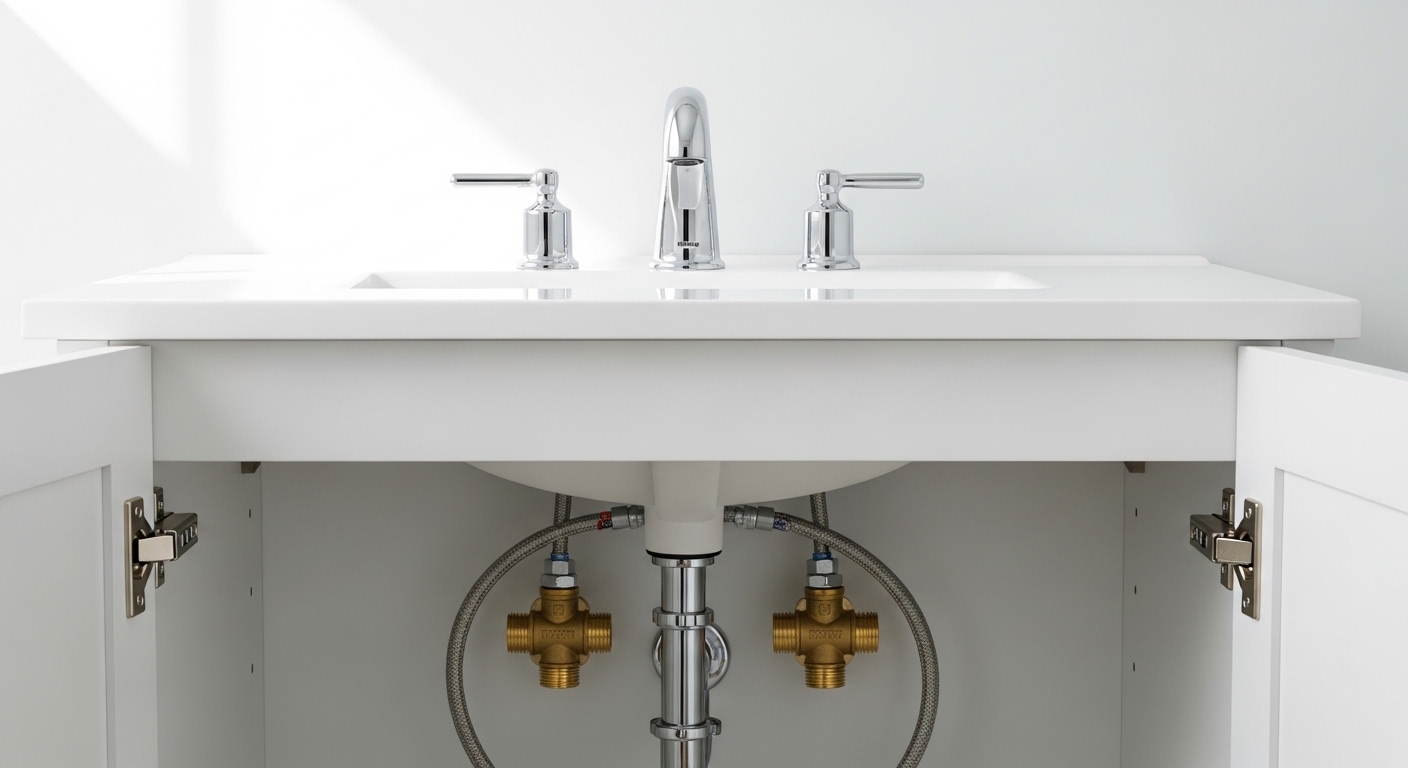
If you’ve been searching for exactly how to replace a bathroom faucet Kohler owners actually have on their sinks, here’s the honest truth: it’s one of the most beginner-friendly plumbing jobs in the house. Kohler engineers most of their lavatory faucets around simple, tool-light mounting systems, so you rarely need more than a basin wrench, an adjustable wrench, a bucket, and a rag. Below I’ll walk you through the whole thing — the tools, the exact steps, the Kohler-specific quirks (like their quick-connect hoses and Katalyst-era mounting hardware), and the mistakes that turn a 40-minute job into a wet, frustrating afternoon.
What tools and parts do you actually need to swap a Kohler bathroom faucet?
You need a basin wrench, an adjustable wrench (or 8″ channel-lock pliers), a bucket, a flashlight, plumber’s tape (PTFE), and either a fresh gasket or plumber’s putty — plus the new faucet itself. That’s the core kit for 90% of Kohler lavatory swaps.
Kohler faucets usually ship with their own mounting hardware and, on newer models, pre-attached quick-connect supply hoses, so you may not need to buy separate connectors. But before you start, measure your sink’s hole configuration — this is the single most important thing to get right.
- Basin wrench — the long-handled, swiveling-jaw tool that reaches the mounting nuts hidden behind the bowl. Almost non-negotiable for tight vanities.
- Adjustable wrench — for the supply-line coupling nuts at the shutoff valves.
- Plumber’s tape — wrap 2–3 turns clockwise on any threaded metal connection.
- Bucket + towel — the P-trap and lines always hold a little leftover water.
- New supply lines — buy fresh braided stainless steel lines if yours are older than about 8 years; they’re cheap insurance against a burst hose.
- Silicone or plumber’s putty — to seal the faucet base against the deck.
If you’re unsure which fasteners hold your specific faucet down, our breakdown of bathroom faucet nuts and which one you actually need to buy shows the plastic wing nuts, brass mounting nuts, and quick-mount collars Kohler uses across its lineup.
How do you know if your sink is 1-hole, centerset, or widespread before buying a Kohler replacement?
Count the holes drilled in your sink or countertop and measure the distance between the outer two. One hole means a single-hole faucet; three holes spaced 4 inches center-to-center is “centerset”; three holes spaced 8–16 inches apart is “widespread.” Kohler sells all three, and buying the wrong style is the #1 reason a replacement won’t fit.
Here’s the quick field test: lift the sink stopper area and look under the deck. If you see one hole with a deck plate (escutcheon) hiding extra holes, you may be able to switch styles by adding or removing that plate. Kohler single-hole faucets often include an optional escutcheon so they can cover a 3-hole sink — a handy trick if you’re going from a dated centerset to a sleek single-lever design.
| Configuration | Holes | Spacing | Best for |
|---|---|---|---|
| Single-hole | 1 | N/A | Small vanities, modern look, fastest install |
| Centerset | 3 | 4″ apart | Standard builder-grade bathrooms |
| Widespread | 3 | 8″–16″ apart | Larger vanities, upscale/custom look |
| Wall-mount | 2 (in wall) | Varies | Vessel sinks, statement bathrooms |
If your old faucet is a three-piece widespread that’s been dripping, don’t assume you need a full replacement first — sometimes it’s a cartridge, not the whole fixture. Our guide on why a widespread faucet drips and whether to repair or replace it can save you the cost of a new faucet entirely.
How do you remove the old Kohler faucet without flooding the cabinet?
Turn off both angle-stop valves under the sink (turn clockwise until they stop), open the faucet to release pressure, place a bucket underneath, then disconnect the supply lines and unscrew the mounting nuts. The whole removal takes about 15 minutes once the water’s off.
Go slow and follow the order — rushing the shutoff step is how cabinets get soaked. Here’s the exact sequence:
- Shut off the water. Rotate both shutoff valves clockwise. If your bathroom has no local shutoffs, close the main house valve.
- Relieve pressure. Open the faucet handles fully so residual water drains out.
- Disconnect the supply lines. Use an adjustable wrench on the coupling nuts. Have your bucket ready — a cup of water usually spills.
- Detach the drain lift rod. If your Kohler faucet has a pop-up drain, loosen the clevis screw and pull the lift rod free.
- Remove the mounting nuts. Reach up with the basin wrench and loosen the nuts securing the faucet to the deck. Older Kohler models use brass nuts; newer ones often have hand-tightened plastic mounting nuts.
- Lift the faucet out. Wiggle it free from the top. Scrape off the old putty or gasket residue and wipe the deck clean.
Corroded or crusty nuts are common on faucets over a decade old. A shot of penetrating oil and 10 minutes of patience beats stripping the nut. If you’re working on a pedestal sink where access is brutal, the tactics in our walkthrough on removing an old faucet from a pedestal sink without a plumber apply directly to tight Kohler installs too.
What’s the step-by-step way to install the new Kohler faucet?
Set the new faucet through the sink holes onto a bead of silicone or a rubber gasket, tighten the mounting nuts from below, connect the supply lines, install the pop-up drain, then turn the water back on and check for leaks. On a single-hole Kohler with quick-connect hoses, this is often a 20-minute job.
Kohler makes this easier than most brands because many models use a “top-mount” or tool-free install where you thread a mounting collar by hand. Follow the printed Kohler instruction sheet for your exact model number — it’ll list any model-specific gasket orientation — but the universal flow is:
- Dry-fit first. Set the faucet in place and confirm it sits flush and the handle clears the wall/backsplash.
- Seal the base. Use the supplied gasket if there is one; otherwise lay a thin rope of plumber’s putty or a bead of clear silicone around the underside of the base plate.
- Drop it in and secure. Feed the shanks and supply hoses through the hole(s), then tighten the mounting nut(s) underneath. Snug is enough — over-torquing cracks ceramic sinks.
- Connect supply lines. Attach hot to the left valve, cold to the right. Wrap PTFE tape on metal threads. Hand-tighten, then a quarter-turn with the wrench.
- Install the pop-up drain. Feed the lift rod through the faucet body, connect it to the clevis and horizontal pivot rod, and test that the stopper seats and lifts.
- Restore water and test. Open the shutoffs slowly, run hot and cold, and watch every joint for drips for a full 2 minutes.
One Kohler-specific tip: their newer bathroom faucets frequently come with pre-installed, color-coded quick-connect supply hoses. Don’t over-tighten those into the valve — a firm hand-tighten plus a slight nudge is the spec. Cranking them can deform the O-ring and cause the exact leak you’re trying to avoid.
Why is my new Kohler faucet leaking at the base or supply line?
A leak at the base almost always means the gasket shifted or the putty seal broke when you tightened the mounting nut; a leak at the supply line means the coupling nut is either under-tightened, cross-threaded, or missing its washer. Both are fixable in five minutes without pulling the faucet.
Diagnose by touch: dry everything, then run water and feel each joint. If water beads at the sink deck, re-seat the gasket. If it drips from a supply connection, back the nut off, check the washer, add PTFE tape, and re-tighten a quarter-turn past hand-tight. Don’t just keep cranking — over-tightening a compression fitting can split the ferrule and make the leak worse.
If you added or reused a shutoff and the leak is at the valve stem, the valve packing may need a slight snug or replacement rather than anything to do with the faucet itself. And if you’re teeing off a single supply to feed a bidet sprayer or second fixture, get the right fitting — our explainer on the faucet supply line tee and how to pick the right one covers the sizing that prevents slow weeps.
Should you replace the supply lines and shutoff valves while you’re at it?
Yes — if your braided supply lines are more than about 8 years old or show any rust, replace them while the cabinet is already open. New stainless braided lines cost only a few dollars each, and a burst supply hose is one of the most common causes of household water damage.
The shutoff valves are a judgment call. If a valve turns smoothly and seals fully, leave it. But if it feels gritty, won’t fully stop the water, or weeps at the stem, swap it now — you’ll never have a better opportunity than when the water’s already off. Quarter-turn ball valves are more reliable than the old multi-turn compression stops and are worth the small upgrade.
How long does replacing a Kohler bathroom faucet take, and what does it cost?
Plan on 30–60 minutes for a first-timer replacing a like-for-like Kohler faucet, and $0 in labor if you DIY. The faucet itself runs roughly $80–$350 depending on finish and style, plus about $15–$30 in supply lines, tape, and sealant if you’re refreshing those.
The variables that stretch the time are corroded old hardware, awkward pedestal or vanity access, and switching hole configurations. Going from a 3-hole centerset to a single-hole design with a deck plate is easy; going the other direction (needing more holes drilled) is a job for a fabricator, not a Saturday DIY. When in doubt, buy a Kohler replacement that matches your existing hole count and spacing.
Finish matters for longevity too. Kohler’s Vibrant PVD finishes resist tarnish and water spotting far better than cheap electroplated chrome. If you’re weighing a warm, bright look, our honest take on polished nickel faucets’ pros and cons helps you decide whether that finish suits a busy family bathroom before you commit.
Is replacing a Kohler bathroom faucet a job you can really DIY?
For the vast majority of homeowners, yes. If you can turn a wrench, follow six steps, and check for leaks, you can replace a bathroom faucet Kohler model without paying a plumber $150–$250 in labor. The only times to call a pro are when you’re changing the sink’s hole configuration, dealing with badly corroded galvanized pipe, or you find hidden damage behind the vanity.
Everything else — the shutoffs, the mounting nuts, the supply lines, the pop-up drain — is squarely in DIY territory. Take photos before you disconnect anything, keep the Kohler instruction sheet handy, and don’t overtighten. That’s the whole game.
FAQ
Do I need plumber’s putty or silicone for a Kohler bathroom faucet?
Use whichever the Kohler instruction sheet specifies for your model. Many newer Kohler faucets include a rubber gasket that needs no putty at all. If yours doesn’t, clear silicone is the modern choice — it seals well and won’t stain natural stone, whereas plumber’s putty can leave an oil ring on porous countertops.
Can I put a single-hole Kohler faucet on a 3-hole sink?
Yes. Most Kohler single-hole faucets ship with an optional escutcheon (deck plate) that covers the two outer holes of a standard 4-inch centerset sink. Just confirm your sink is drilled at 4-inch spacing, not 8-inch widespread, before you buy.
Why won’t my old Kohler mounting nuts come loose?
Years of moisture corrode brass and steel nuts onto the shanks. Spray penetrating oil, wait 10–15 minutes, and try again with a basin wrench. If it’s truly seized, a mini hacksaw or a nut splitter will cut it off without damaging the sink — you’re throwing the old faucet away anyway.
How do I match a replacement cartridge instead of the whole faucet?
If your Kohler faucet only drips or the handle feels loose, you may just need a new ceramic-disc cartridge. Find the model number stamped under the spout or on the original box, then order the exact Kohler cartridge — they’re not universal. Replacing a cartridge is a 15-minute fix that’s cheaper than a whole faucet.
Does replacing the faucet myself void the Kohler warranty?
No. Kohler’s limited lifetime faucet warranty covers the product against defects regardless of whether a homeowner or a plumber installs it, as long as the installation follows the included instructions. Keep your receipt and model number; damage from improper installation (like over-tightening) isn’t covered, which is one more reason not to crank those nuts.
What if there are no shutoff valves under my sink?
Then you’ll shut off the main water supply to the house for the duration of the job. This is also the perfect moment to add angle-stop shutoff valves so future repairs don’t require killing water to the whole home. Adding quarter-turn stops is a straightforward part of the same project.
About the author: This guide was written by the vigacc fixtures team, drawing on hands-on installation of hundreds of lavatory faucets across single-hole, centerset, and widespread configurations. We manufacture and test bathroom and kitchen faucets to international plumbing standards (including UPC/cUPC and lead-free NSF/ANSI 61 & 372 compliance), and every faucet we ship is pressure- and cycle-tested before it leaves the line. When we recommend a torque spec or a sealing method, it’s because we’ve watched what fails in the field — not copied from a spec sheet. For product help, visit www.viga.cc.
WeChat
Scan the QR Code with WeChat