 iVIGA Faucet Manufacturer & Factory

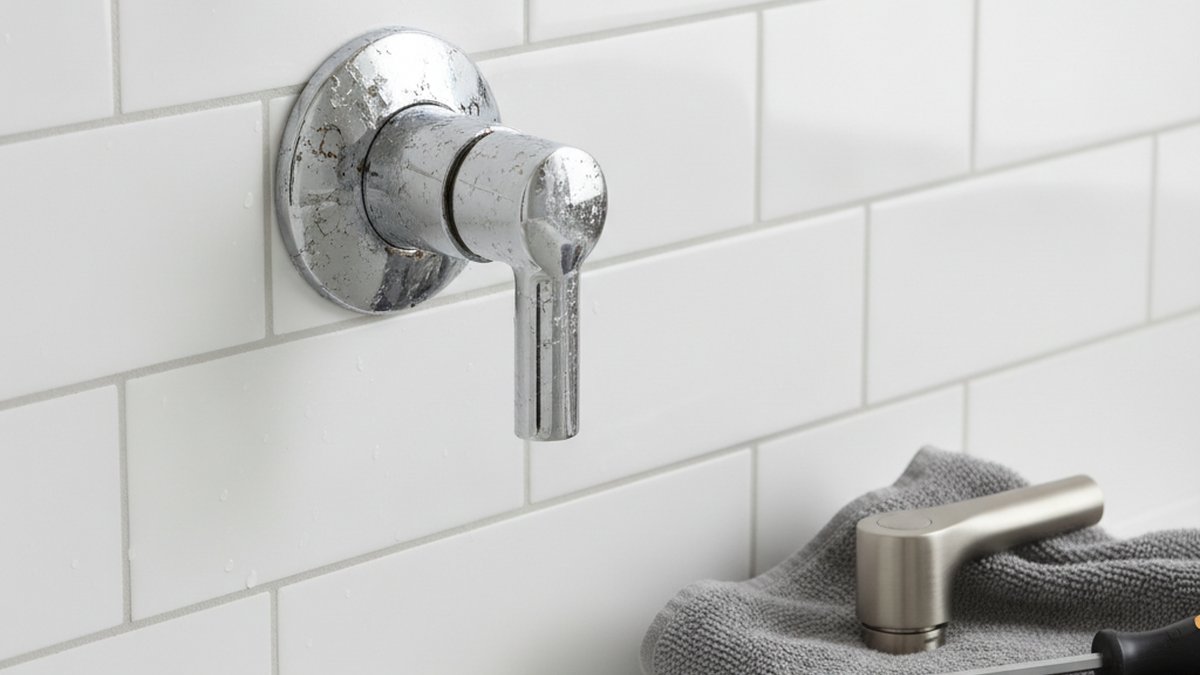
Learning how to replace a shower faucet handle is one of the most beginner-friendly plumbing jobs in the whole bathroom, because in almost every case you are only touching the handle itself — not the valve, not the pipes, and nothing behind the wall. If your handle is cracked, spinning loosely, leaking around the base, hard to turn, or just outdated, you can usually swap it with basic hand tools. Below, iVIGA walks you through exactly what to buy, how to match the new handle to your existing valve, and how to avoid the two mistakes that turn a 20-minute job into a weekend headache.
What tools and parts do I actually need to replace a shower handle?
You need a Phillips screwdriver, a set of hex (Allen) keys, a flathead screwdriver or plastic pry tool, plumber’s grease, and a replacement handle that matches your valve. That is genuinely the whole list for 90% of shower handles. You do not need to solder, cut pipe, or open the wall.
Here’s the short shopping and prep checklist before you start:
- Replacement handle — either the exact OEM part or a universal handle kit that fits your valve brand.
- Phillips + flathead screwdriver — for the handle screw and prying off the index cap.
- Hex/Allen key set — many single-lever handles use a small set screw underneath.
- Plumber’s grease (silicone) — a dab on the valve stem so the next removal is easy.
- Old towel + flashlight — cover the drain so no screws vanish, and light up the valve.
- White vinegar — to soak off mineral crust if the handle is stuck.
One tip that saves a lot of frustration: before you buy anything, take a clear photo of your handle from the front and the side, plus any brand name stamped on the trim. That photo tells you whether you need a lever, a cross handle, or a round knob, and it helps you match the finish.
Do I need to turn off the water to change a shower faucet handle?
For most handle-only swaps, no — you don’t strictly need to shut off the water, because the valve behind the wall stays closed and keeps the water contained. But you absolutely should turn it off anyway if there’s any chance you’ll disturb the valve stem, the cartridge, or the escutcheon plate. It’s a five-second insurance policy against a surprise spray.
If your shower has a dedicated shut-off (some newer valves have integral stops behind the trim plate), close those with a flathead screwdriver. If not, shut off the main water supply to the house or the bathroom branch line. Then open the shower to release any pressure still in the line. When the trickle stops, you’re safe to work. This is the same “kill the water first” discipline we stress in our guide on how to change a shower thermostatic valve without flooding the bathroom — with a handle swap the risk is far lower, but the habit is worth keeping.
How do I remove the old shower faucet handle step by step?
Remove the old handle by finding and loosening its single fastener, then pulling the handle straight off the valve stem. The screw is almost always hidden — either under a snap-on index cap on the front, or as a set screw tucked underneath a lever handle. Here’s the full sequence.
- Find the screw. On a knob or cross handle, pop off the little decorative cap (often marked “H/C” or a brand logo) with a flathead or your fingernail. On a single lever, look on the underside of the lever for a small hex set screw.
- Loosen the fastener. Use a Phillips screwdriver for a cap-covered screw, or the correct Allen key for a set screw. Turn counter-clockwise. Don’t fully drop tiny set screws — they roll straight into the drain.
- Pull the handle straight off. Grip it and pull directly outward, in line with the wall. Wiggle gently side to side if needed, but don’t crank up or down — that can bend the valve stem.
- If it’s stuck, break the corrosion. Years of hard-water minerals can cement a handle in place. Wrap the base in a vinegar-soaked rag for 15–20 minutes, then try again. A handle puller (a cheap $10 tool) works when it truly won’t budge.
- Inspect the stem. Once off, look at the exposed valve stem or cartridge. If it’s clean and undamaged, you only need a new handle. If it’s chewed up, corroded, or leaking, that points to a cartridge job, not just a handle.
How do I know which replacement shower handle actually fits my valve?
Your new handle has to match the valve brand and the stem/broach it clips onto — not just the look. A handle that fits Moen won’t fit Delta, and a handle for a splined stem won’t grip a square broach. Match the mechanism first, the finish second.
The single most reliable route is to identify the valve maker (Moen, Delta, Kohler, Pfister, or a specific cartridge series) and buy that brand’s handle or a universal kit that explicitly lists it. The broach — that ridged pattern on the tip of the stem — is what your handle grips, so it has to be an exact match. Here’s a quick comparison of your three sourcing options:
| Replacement route | Best for | Typical cost | Fit certainty |
|---|---|---|---|
| Exact OEM handle (same brand/model) | Known valve brand, want a perfect match | $15–$60 | Highest — guaranteed fit |
| Universal handle kit (multi-adapter) | Unknown brand or older valve | $12–$35 | Good — includes several broach adapters |
| Full trim + handle upgrade set | Refreshing the whole look/finish | $40–$150 | High if valve brand matches trim |
If you’re upgrading the finish while you’re in there, think about how the handle will read against the rest of the room. A warm, soft-sheen handle can transform a dated shower — our deep-dive on whether a brushed nickel faucet for the shower is really the best finish breaks down which metals hide water spots and age best in a wet environment. And if the whole shower feels tired, replacing the handle is often the first small step before a bigger upgrade to a shower system with a rain head and handheld.
How do I install the new shower faucet handle correctly?
Install the new handle by sliding it straight onto the valve stem, aligning it to the “off” position, then tightening the single screw or set screw — snug, not gorilla-tight. Over-tightening cracks the handle or strips the stem, so stop as soon as it’s firm and doesn’t wobble.
- Grease the stem. Wipe a thin film of silicone plumber’s grease on the valve stem. It protects against corrosion and makes the next handle change effortless.
- Set the position. Rotate the valve stem to fully “off,” then place the handle so its “off” orientation lines up (lever pointing down or centered, depending on the design).
- Push it home. Press the handle straight onto the broach until it seats fully against the wall or escutcheon.
- Tighten the fastener. Drive in the screw or set screw firmly by hand tool only — no power drills. Firm resistance is enough.
- Snap the cap back on. Replace the index cap or trim ring so no screw is exposed to water.
- Test it. Turn the water back on, cycle hot and cold, and check that the handle stops water fully and doesn’t drip at the base. If it drips, that’s a valve/cartridge issue, not the handle.
What if the handle spins, leaks, or the water won’t shut off after replacing it?
If the new handle spins freely without controlling water, or water still drips after you’ve swapped it, the problem is almost never the handle — it’s the cartridge or valve stem behind it. A handle only grips and turns the stem; if the stem itself is worn or the cartridge seals have failed, no new handle will fix it.
Here’s how to read the symptoms:
- Handle spins with no resistance: the broach is stripped or the handle broach doesn’t match the stem — recheck fit or replace the cartridge.
- Water won’t fully shut off: worn cartridge seals; replace the cartridge (an inexpensive part, often under $25).
- Drip only at the handle base: a failed O-ring on the stem — replace the O-ring or cartridge.
- Handle feels gritty or stiff: mineral buildup on the stem; clean with vinegar and re-grease.
A steady drip is worth fixing fast — it wastes water and slowly erodes the valve seat. The same logic we cover in our walkthrough on how to fix a kitchen faucet drip before it wastes another gallon applies to showers: chase the drip to its real source (usually the cartridge) rather than throwing parts at the handle.
How much does it cost, and is it worth doing yourself?
Replacing a shower faucet handle yourself typically costs $12–$60 for the part and takes 15–45 minutes. Hiring a plumber for the same job usually runs $75–$200 in labor alone. For a job this simple, DIY is almost always worth it unless the underlying valve also needs work.
Where it stops being a beginner job: if you discover the valve body itself is leaking inside the wall, or the pipe connections are corroded, that’s a different project involving the rough-in valve — and often the wall. At that point, calling a pro is the smart call. But a straightforward handle swap? That’s firmly in DIY territory, and doing it once teaches you the layout of your own shower valve for the future.
FAQ
Can I replace just the shower handle without replacing the whole valve?
Yes. In the vast majority of cases the handle and the valve are separate parts, so you can replace a cracked or worn handle while leaving the valve, cartridge, and plumbing completely untouched. You only need to touch the valve if the water won’t shut off or the handle spins uselessly, which points to a cartridge issue rather than the handle.
How do I remove a shower handle with no visible screws?
Look harder — the screw is hidden, not absent. On knob and cross handles, there’s a snap-off decorative cap on the front (often marked hot/cold) covering a Phillips screw. On single levers, the fastener is a small hex set screw on the underside of the lever. Pop the cap or feel underneath, and you’ll find it.
Are shower faucet handles universal or brand-specific?
They’re mostly brand-specific because each manufacturer uses a different valve stem broach (the ridged tip the handle grips). Delta, Moen, Kohler, and Pfister all differ. Universal handle kits exist and work well, but they rely on multiple adapters to match your specific broach — so you still need to identify or test the fit.
Why is my shower handle stuck and won’t come off?
It’s usually corrosion — years of hard-water minerals bonding the handle to the valve stem. Wrap the base in a rag soaked in white vinegar for 15–20 minutes to dissolve the crust, then pull straight out with a gentle wiggle. If it still won’t budge, a $10 handle puller tool applies even force without bending the stem.
Do I need a plumber to replace a shower faucet handle?
No, not for a handle-only swap. It’s a hand-tool job most homeowners finish in under an hour with a screwdriver and an Allen key. You’d only need a plumber if you uncover a leaking valve body inside the wall or corroded pipe connections, which is a separate and more involved repair.
What finish should I choose for a replacement shower handle?
Match it to your existing trim and showerhead for a cohesive look, and favor finishes that hide water spots in a wet environment. Brushed nickel and matte black both mask spotting far better than polished chrome. If you’re refreshing multiple fixtures, coordinating the handle with your tub filler — see our guide to the best bathtub faucet set — keeps the whole bathroom looking intentional.
About the author: This guide was written by the iVIGA product and installation team, drawing on hands-on testing of hundreds of shower valves, handles, and trim kits across major North American valve brands. We install, dismantle, and stress-test these components in our own workshop before recommending any replacement approach.
About iVIGA: iVIGA (www.viga.cc) designs and manufactures faucets, shower systems, and bathroom fixtures for customers worldwide. Our shower components are built from corrosion-resistant brass and are tested to industry standards including cUPC and NSF/ANSI 61 for safe drinking-water contact, with a limited lifetime warranty on finish and function on qualifying products. Always keep your proof of purchase, since warranty coverage on handles and cartridges depends on it.
WeChat
Scan the QR Code with WeChat