 iVIGA Faucet Manufacturer & Factory

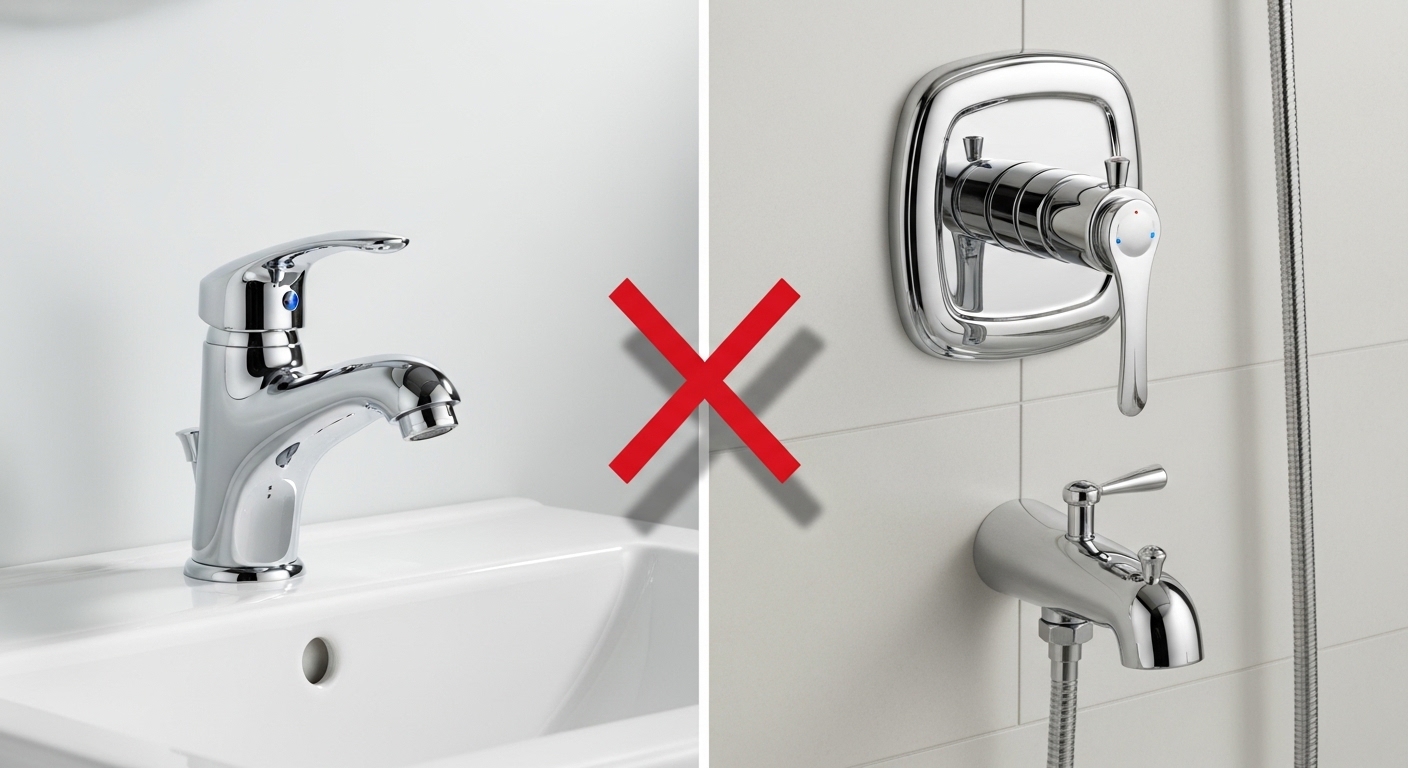
If you’ve searched how to change a bathroom faucet for shower use, you’ve probably run into a lot of confusing answers, because the phrase means two very different jobs depending on your bathroom. The good news: both versions are doable by a confident DIYer in an afternoon, and neither one requires you to open up the wall in most cases. Below, I’ll walk you through exactly which project you’re actually facing, what parts to buy, and how to do it without flooding the room — the same way I’d explain it to a friend standing in their bathroom holding a wrench.
First, let’s clear up the terminology, because getting this wrong is what sends people to the hardware store three times in one weekend.
Wait — do you mean a sink faucet, or converting a tub faucet into a shower?
These are two separate jobs, and knowing which one you have saves you hours. A “bathroom faucet” usually means the fixture on your sink/vanity. A shower runs on a completely different valve system inside the wall. You cannot convert a sink faucet into a working shower — the water volume and mounting are wrong. What people almost always mean by “change a bathroom faucet for shower” is one of the two projects below.
- Tub-to-shower conversion: You have a bathtub with a spout and want a shower head added or swapped in. This is the most common DIY version and often needs zero wall demolition.
- Shower valve/trim replacement: You already have a shower and want to replace the handle, valve cartridge, or shower head — essentially “changing the shower faucet.”
If you genuinely just want to replace the fixture on your vanity, that’s a different (easier) task, and our guide on how to replace a bathroom faucet yourself in under an hour covers it start to finish. For everything shower-related, keep reading.
What’s the easiest way to add a shower to an existing bathtub faucet?
The easiest way is a diverter tub spout paired with a slide-bar or wall-mount shower kit — no wall opening required. If your tub already has a single handle and a spout, you swap the plain spout for one with a pull-up diverter, then run a supply up to a shower head. This is the classic “add-a-shower” conversion and it’s the friendliest DIY on this list.
Here’s the honest catch: a diverter spout only works if your plumbing was built to feed a shower riser, or you use an exposed conversion kit that runs a visible pipe up the wall. Many older tub-only setups were never plumbed for an overhead shower, so an exposed riser kit (the chrome pipe you see running up the wall to the head) is the realistic no-demo option.
- Shut off the water — either the bathroom’s shutoff or the main. Open the tub faucet to drain pressure.
- Remove the old tub spout. Slip-fit spouts pull off after loosening a small set screw underneath; threaded spouts unscrew counterclockwise.
- Install the new diverter spout with fresh plumber’s tape on the threaded nipple. Hand-tighten, then a quarter turn with a wrench — don’t crank it.
- Mount the shower riser pipe or slide bar, connect the supply hose, and seal each threaded joint with tape.
- Turn the water back on slowly and check every joint for drips before you celebrate.
If your tub spout sits oddly far from the wall or the pipe stub is too short to hold a new spout tightly, don’t force it — that’s a specific, fixable problem. We break down the exact fix in tub spout pipe too short? here’s how to fix it without re-plumbing the wall.
How do you replace the shower faucet (handle and valve) if you already have a shower?
If you already have a shower and just want to change the faucet, you’re replacing the trim (handle, escutcheon, shower head) and possibly the cartridge inside the valve. Ninety percent of “my shower faucet is bad” situations are solved by a new cartridge and trim kit — you rarely need to replace the whole valve body buried in the wall.
The single most important rule: match the valve brand and model. Shower cartridges are not universal. A Moen cartridge won’t fit a Delta valve, and Kohler has its own system. Pull your old handle and cartridge first, photograph it, and take it to the store — or read the tiny model number stamped on the trim plate.
Do you have to shut off the water at the main?
Not always — but usually yes for showers. Sink faucets have angle stops right under the vanity; most tub/shower valves do not have local shutoffs. That means for shower work you’ll typically shut off the main water supply to the house, or an integrated stop screw if your valve has one. When in doubt, kill the main. It costs you five minutes and saves you a soaked bathroom.
What tools and parts do you actually need to change a bathroom faucet for shower use?
You need less than you’d think — most conversions use hand tools you probably own. Here’s the realistic kit for both the tub-to-shower conversion and a shower trim swap.
- Adjustable wrench and/or a set of channel-lock pliers
- Allen/hex key set — set screws on spouts and handles are almost always hex
- Plumber’s tape (PTFE/Teflon tape) for every threaded joint
- Cartridge puller if you’re replacing a stuck cartridge (brand-specific ones exist)
- Silicone caulk for sealing escutcheons against the wall
- A rag and a bucket — there’s always some trapped water
- The new part: diverter spout + shower riser kit, OR a trim kit + matching cartridge
One underrated tip: buy the plumber’s tape and a spare cartridge before you start. A half-finished shower with the water off overnight is a miserable way to learn you were missing a $12 part.
Which conversion type is right for your bathroom?
The right choice depends on what you have now and how much wall you’re willing to open. Here’s a straight comparison of the realistic paths, so you can pick before you buy anything.
| Conversion Type | Best For | Wall Work? | Typical Cost | Difficulty |
|---|---|---|---|---|
| Diverter spout + exposed riser kit | Tub-only bathroom, no shower yet | None (visible pipe) | $40–$120 | Easy |
| Handheld shower on tub spout diverter | Renters, quick upgrade, accessibility | None | $25–$80 | Very easy |
| Shower trim + cartridge swap | Existing shower, worn/leaky faucet | None | $50–$180 | Moderate |
| New in-wall shower valve | Full remodel, changing handle location | Yes (open wall) | $150–$250+ parts | Hard / pro-level |
Notice the pattern: three of the four options need no wall demolition. Only when you’re relocating the valve or doing a full remodel do you cross into “open the wall and maybe call a pro” territory. For most people asking how to change a bathroom faucet for shower use, one of the top three rows is the answer.
How much does it cost, and how long does it take a first-timer?
For a no-demo tub-to-shower conversion, budget $40–$150 in parts and 2–4 hours as a first-timer. A shower trim-and-cartridge swap runs $50–$180 and 1–2 hours once the water’s off. The big cost jump only happens when you open the wall for a new valve, where you’re weighing a plumber’s labor on top of parts.
Where beginners lose time isn’t the installation — it’s the trips back to the store for the wrong cartridge or a spout that didn’t fit the pipe stub. Measure and photograph first. If you’re also upgrading the shower head while you’re in there, our rundown of the best shower faucet and head combos for a remodel and the case for a square rainfall shower head will help you pick a head that matches your new valve’s flow.
What are the most common mistakes when converting a tub faucet to a shower?
The top mistakes are overtightening threaded connections, skipping plumber’s tape, and mismatching the cartridge to the valve brand. Any one of these turns a two-hour job into a leaky weekend. Here are the ones I see most often, and how to dodge them.
- Cranking the spout too tight. Brass and chrome fittings crack. Snug plus a quarter turn is enough.
- No PTFE tape on threads. Wrap 3–4 times clockwise. This is the single cheapest leak insurance there is.
- Wrong cartridge brand. Moen ≠ Delta ≠ Kohler. Match it exactly.
- Forgetting to seal the escutcheon. A bead of silicone keeps water out of the wall cavity, where it does real damage.
- Not testing at low pressure first. Turn water back on slowly and inspect before full pressure.
- Ignoring hard-water buildup. If your old parts were crusted with lime, clean the threads. See our guide to the best hard water cleaner for a faucet with stubborn lime buildup.
When should you stop and call a plumber?
Call a plumber when the job requires opening a finished wall, soldering copper, or moving the valve location. Those cross from “DIY faucet swap” into real plumbing with permit and water-damage stakes. Signs you’re in over your head: no accessible shutoff, corroded pipe stubs that crumble, or a valve body that’s cracked rather than just worn. There’s no shame in it — a $150 service call beats a $3,000 subfloor repair.
But if you’re just swapping a spout, adding an exposed riser, or replacing trim and a cartridge, that’s squarely in weekend-DIY range for most homeowners.
FAQ
Can I turn my bathroom sink faucet into a shower?
No. A sink faucet delivers too little water and mounts on a vanity, not a wall valve. To get a shower you convert the tub/shower plumbing — either add a diverter spout with a riser, or replace the shower valve trim. The sink faucet stays a sink faucet.
Do I need to open the wall to change a tub faucet into a shower?
Usually not. An exposed riser conversion kit runs a visible pipe up the wall to a shower head, and a diverter spout swap needs no demolition at all. You only open the wall when relocating the valve or installing a new in-wall valve body during a full remodel.
How do I know which shower cartridge to buy?
Match the brand and model of your existing valve. Remove the handle, pull the old cartridge, photograph it, and either read the model number on the trim plate or take the part to the store. Cartridges are brand-specific — a Delta won’t fit a Moen or Kohler valve.
How long does a tub-to-shower faucet conversion take?
A first-timer should budget 2–4 hours for a no-demo conversion and 1–2 hours for a trim-and-cartridge swap. Most of the delay comes from mismatched parts, so measure and photograph everything before buying.
What size shower head fits after I convert?
Standard shower arms and heads use a universal ½-inch NPT thread, so almost any consumer shower head will fit your new riser or arm. Focus on flow rate (2.5 GPM or the water-saving 1.8 GPM) and spray style rather than thread size. Wrap the arm threads with PTFE tape before attaching the head.
Is it cheaper to convert a tub to a shower myself?
Yes, for a no-demo conversion. Doing it yourself keeps you in the $40–$180 parts range versus several hundred in labor for a plumber. The math flips only when the job needs wall work or a relocated valve, where professional installation is worth it.
A note on doing this right — and on the parts you choose
Author note: This guide is written by the vigacc fixtures team, drawing on hands-on installation of tub, shower, and vanity fixtures across thousands of real bathrooms. vigacc designs and manufactures faucets, shower systems, and bathroom fixtures sold through www.viga.cc, and we build our shower valves and diverter spouts to standard ½-inch NPT connections so they drop into common U.S. plumbing without adapters.
On the quality side: look for fixtures that meet ASME A112.18.1 / CSA B125.1 and are certified lead-free under NSF/ANSI 372 — the same standards our shower and faucet lines are tested against — and check the finish warranty (a solid brass valve body with a lifetime finish warranty outlasts cheap zinc alloy). If you value drinking-water safety throughout the home, the same lead-free logic applies to outdoor spigots; see our explainer on what a lead-free outdoor faucet is and whether you need one. Choosing a certified, well-built fixture is what turns a weekend conversion into one you don’t have to redo in two years.
WeChat
Scan the QR Code with WeChat