 iVIGA Faucet Manufacturer & Factory

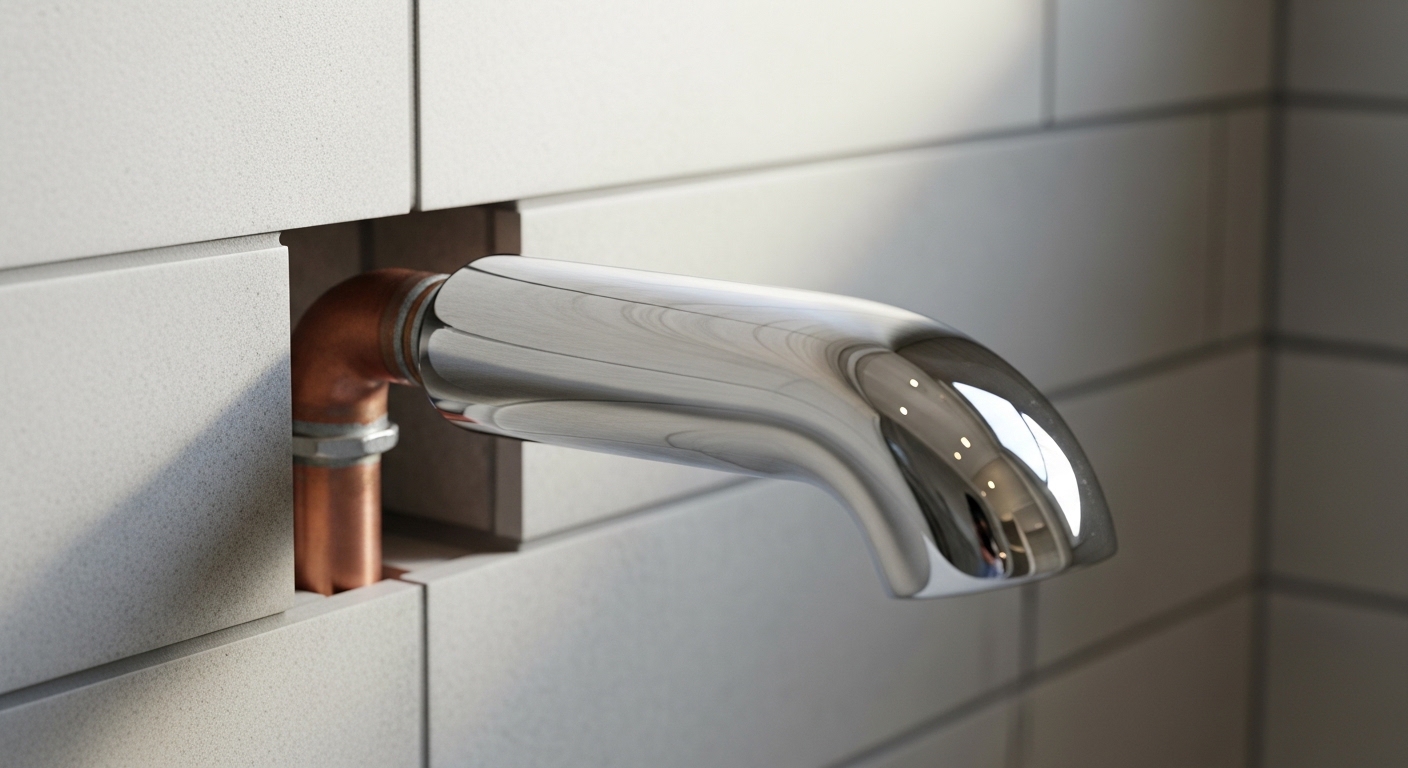
A tub spout pipe that’s too short is one of the most common and most fixable bathtub plumbing problems out there — and a “tub spout pipe too short” situation usually comes down to a half-inch or so of missing reach, not a broken pipe in the wall. When the stub-out (the pipe coming out of the wall) doesn’t stick out far enough, your spout either won’t thread on all the way, sits buried against the tile, or leaves an ugly gap that lets water track behind the wall. The good news: in the vast majority of cases you fix it from the outside with a cheap brass nipple or the right style of spout, in about 20 minutes, with no demolition.
Below, we’ll walk through exactly why this happens, how to measure what you actually have, the two main spout connection types (and which fix each one needs), and when — honestly — you do need to call a plumber. This is the same diagnostic process our product engineers at VIGA use when we spec spouts for hotel and residential bathroom projects, so you’re getting the practical version, not a guessing game.
Why is my tub spout pipe too short in the first place?
Your tub spout pipe is too short because the rough-in pipe was cut or set before the final wall thickness was known — and then tile, backer board, or a tub surround panel added thickness the plumber didn’t account for. It’s an installation-sequence problem, not a defect.
Here’s what usually causes it:
- Added wall thickness after rough plumbing. Someone installed cement backer board plus ½” tile (often ¾”–1″ total) on top of the original wall, but the copper or PEX stub-out was set flush for drywall. Now the pipe ends too deep inside the wall.
- The wrong nipple length was used. A threaded spout needs a brass nipple of a specific length to land correctly. Grab one that’s too short and the spout bottoms out before it seats against the wall.
- A spout swap mismatch. You replaced an old slip-fit (setscrew) spout with a new threaded spout, or vice versa. The two connection styles need completely different pipe lengths, so a perfect old spout becomes a too-short situation overnight.
- The copper drop was cut short during a remodel. Whoever did the demo trimmed the pipe back to “clean it up” and removed the reach you needed.
Knowing the cause matters because it tells you whether you’re adding length (a nipple or extension) or changing the spout to match the pipe you already have.
How do I measure my tub spout pipe to know what fix I need?
Measure the exposed pipe length from the finished wall surface and identify whether the pipe is threaded or smooth — those two numbers decide everything. Grab a tape measure and a flashlight before you buy a single part.
Do this in order:
- Remove the old spout. For a slip-fit spout, loosen the small setscrew on the underside with a hex/Allen key and pull straight off. For a threaded spout, turn it counterclockwise (wrap a rag around it to protect the finish).
- Identify the pipe. Look at the pipe sticking out of the wall. Is it a threaded brass or galvanized nipple (you’ll see spiral threads)? That’s a threaded connection. Is it smooth copper with no threads? That’s a slip-fit connection.
- Measure the stick-out. Hold your tape flat against the finished tile and measure how far the pipe extends past the wall. Write it down.
- Measure the pipe diameter. Most tub spouts use ½” NPT threaded pipe (about ⅞” outside diameter) or ½” / ¾” smooth copper for slip-fit. Knowing this keeps you from buying the wrong adapter.
As a rule of thumb: a threaded stub-out should give you roughly 1″ to 1¼” of exposed nipple for a standard spout to seat flush. A slip-fit copper stub-out typically wants about 2½” to 4″ of smooth pipe so the spout’s internal channel can slide over it and the setscrew can grab. If you’re short of those targets, that’s your gap to close.
What’s the easiest fix for a threaded tub spout that won’t reach?
For a threaded connection, the easiest fix is to add a longer brass nipple or thread on a short ½” NPT extension so the spout seats flush against the wall. This is a ten-dollar part and a ten-minute job — no wall opening required.
Step by step:
- Thread the existing too-short nipple out of the wall fitting if it’s removable, or leave it and add a brass coupling plus a longer nipple.
- Choose a brass nipple length that puts the pipe end at about 1″–1¼” past the tile. Brass nipples come in ½” increments, so buy two nearby lengths and return the one you don’t use.
- Wrap the threads with 3–4 wraps of PTFE (plumber’s) tape, clockwise, and add a dab of pipe-thread sealant for insurance against drips behind the wall.
- Hand-thread the nipple in, then snug it with a wrench — don’t overtighten brass, it can crack the fitting.
- Thread your spout on. It should stop with the outlet pointing straight down and the base kissing the wall. If it stops short of the wall, your nipple is a touch long; if there’s a gap, it’s still short.
A quick reality check: threaded spouts are designed to stop in the correct orientation through thread depth, not by being cranked tight. If yours points sideways when snug, you adjust with nipple length or a thin spacer — never by forcing it another quarter-turn. If you’re new to working with threaded plumbing connections, our overview of bathroom faucet nuts and threaded fittings explains how NPT threads seal so you don’t strip anything.
What if I have a smooth copper pipe (slip-fit spout) that’s too short?
For a slip-fit spout on smooth copper, you can’t just add length the same way — you either solder on a copper extension, use a slip-fit-to-threaded adapter, or switch to a threaded spout on a new nipple. The right move depends on how much copper you have.
Your three realistic options:
- Slip-fit extension / repair coupling. If the copper is only slightly short, a compression or push-fit copper extension can add 1″–2″ without soldering. Make sure the added section stays smooth where the spout grips.
- Convert to threaded. Sweat (solder) a ½” copper-to-female-NPT fitting onto the stub, then thread in a brass nipple and use a threaded spout. This is the most durable fix and the one we’d pick for a long-term install — it turns a finicky setscrew joint into a solid threaded one.
- Longer slip-fit spout body. Some slip-fit spouts have a deeper internal channel and can swallow a shorter pipe. Check the spout’s spec sheet for “minimum pipe length” before buying.
Whatever you choose, the O-ring inside a slip-fit spout is what actually seals against the copper — so the copper must be clean, smooth, and free of solder beads or burrs. A nicked pipe is the number-one cause of a slip-fit spout that drips even after you fixed the length.
Threaded vs. slip-fit vs. extension: which tub spout fix should I choose?
Choose based on your existing pipe type and how much reach you’re missing. Here’s a side-by-side so you can match your situation to the right part in one glance.
| Fix Method | Best For | Added Reach | Skill Level | Approx. Cost |
|---|---|---|---|---|
| Longer brass nipple | Threaded stub-out that’s ½”–1″ short | Up to ~3″ | Beginner | $5–$12 |
| Threaded extension coupling | Threaded pipe needing a small bump | 1″–2″ | Beginner | $8–$15 |
| Push-fit / compression copper extension | Smooth copper, no soldering wanted | 1″–2″ | Intermediate | $10–$20 |
| Solder copper-to-NPT + threaded spout | Permanent, most reliable fix | Any (rebuild) | Advanced / Pro | $15–$40 |
| Open wall & reset stub-out | Pipe broken or buried >1″ deep | Any | Pro | $150–$400+ |
For most homeowners reading this, the top two rows solve the problem. The bottom row is the worst case — and it’s far rarer than the panic-Googling makes it feel.
Can I fix a short tub spout pipe without opening the wall?
Yes — in roughly 9 out of 10 cases you can fix a short tub spout pipe entirely from the outside, with no wall demolition. You only have to open the wall when the pipe is actually damaged, cross-threaded inside the elbow, or recessed so deep that no extension can reach it.
You’re safe to stay outside the wall when:
- The pipe is intact and just needs a little more length.
- You can see and reach threads or smooth copper.
- The drop-ear elbow behind the wall is solid (no wobble when you wiggle the pipe).
You should open the wall (or call a pro) when:
- The pipe wiggles freely — the elbow may be loose or the strap broken.
- Threads are stripped or cross-threaded and a nipple won’t bite.
- You see active leaking behind the tile when the water runs.
If your spout problem is tangled up with a drip, low pressure, or a diverter that won’t lift, it may not be a length issue at all — our rundown of the most common bathroom faucet problems and solutions helps you tell a length problem apart from a worn cartridge or diverter. And if you’re remodeling around a standalone tub rather than a wall-fed one, the connection logic is different — see our guide to freestanding bathtub faucet setups.
How do I make sure the new spout doesn’t leak after I extend the pipe?
Seal the threads properly, point the spout straight down, and pressure-test before you call it done. A short pipe fixed sloppily just trades a gap problem for a leak problem, so this last step matters.
Before you walk away:
- Use both tape and paste on threaded joints. PTFE tape plus a thin film of pipe-thread compound gives a redundant seal that survives years of thermal cycling.
- Confirm spout orientation. The outlet must point straight at the floor. A tilted spout means the wrong nipple length, not “good enough.”
- Run hot and cold for 2–3 minutes. Watch the base of the spout and, if you can, the wall behind it. No weeping at the wall, no drip from the spout when off.
- Check the diverter. Pull up the diverter and make sure water moves to the showerhead cleanly — a too-short, badly seated spout can let water leak past the diverter.
One more pro tip: quality matters more than people expect on a part this small. A spout cast from solid brass with a true ½” NPT thread will seat predictably; a thin pot-metal spout with a sloppy thread often won’t tighten to the right clock position no matter what nipple you use. That’s exactly why fixture quality and certification are worth caring about even on a $25 part.
Author Note & Why You Can Trust This Guide
This guide was written by the product content team at VIGA (vigacc), drawing on input from our in-house faucet and bathtub-fixture engineers in Kaiping, China — a region known as one of the world’s largest sanitary-ware manufacturing hubs. VIGA has manufactured and exported kitchen and bathroom faucets, tub spouts, and shower fixtures for over a decade, supplying wholesale and project clients worldwide.
Our tub spouts are produced to recognized plumbing standards and tested for thread accuracy, flow, and pressure before they ship — and our threaded fittings are cut to standard ½” NPT tolerances so the “right nipple length” actually behaves the way this article describes. We design to certification benchmarks like UPC/cUPC and back our fixtures with a manufacturer’s warranty, because a spout you bolt into a wall should outlast the trend that made you buy it. Recommendations here reflect real assembly and field-fit experience, not generic web copy.
FAQ
How far should a tub spout pipe stick out of the wall?
For a threaded spout, aim for about 1″ to 1¼” of exposed ½” NPT nipple past the finished wall. For a slip-fit spout, you generally want 2½” to 4″ of smooth copper so the spout can slide over the pipe and the setscrew can grip. Always check your specific spout’s spec sheet, since deep-channel designs vary.
Can I use a tub spout extension instead of replacing the pipe?
Yes. A threaded brass nipple or a slip-fit copper extension adds the missing length without touching the pipe inside the wall. Extensions are the standard fix for a pipe that’s only ½”–2″ too short, and they’re rated for the same pressure as the original line when installed with proper thread sealant.
Why does my tub spout point sideways when I tighten it?
A threaded spout points the wrong way because the nipple is the wrong length — too long and it stops before pointing down, too short and it overshoots. Fix it by changing the nipple length or adding a thin spacer, never by over-tightening. Forcing it can crack the spout or strip the threads.
Is a slip-fit or threaded tub spout better for a too-short pipe?
If you’re converting anyway, a threaded spout on a fresh brass nipple is the more forgiving and durable fix because thread depth controls the seat and seal. Slip-fit is faster but relies on a clean, smooth, undamaged copper pipe and an internal O-ring, which is less tolerant of a pipe that was cut or nicked during a remodel.
Do I need to turn off the water to fix a short tub spout pipe?
You don’t have to shut off the water to swap the spout itself, since the spout sits below the valve and the line isn’t pressurized when the faucet is off. But it’s smart to confirm the tub valve is fully closed first, and if you’re soldering or cutting into copper, shut off and drain the line completely before you start.
What size pipe do most tub spouts use?
Most North American tub spouts use either a ½” NPT threaded connection or a ½” smooth copper slip-fit connection. Some older or imported tubs use ¾” copper. Measure your stub-out diameter before buying so you match the spout or adapter correctly — this is the single most common buying mistake.
WeChat
Scan the QR Code with WeChat