 iVIGA Faucet Manufacturer & Factory

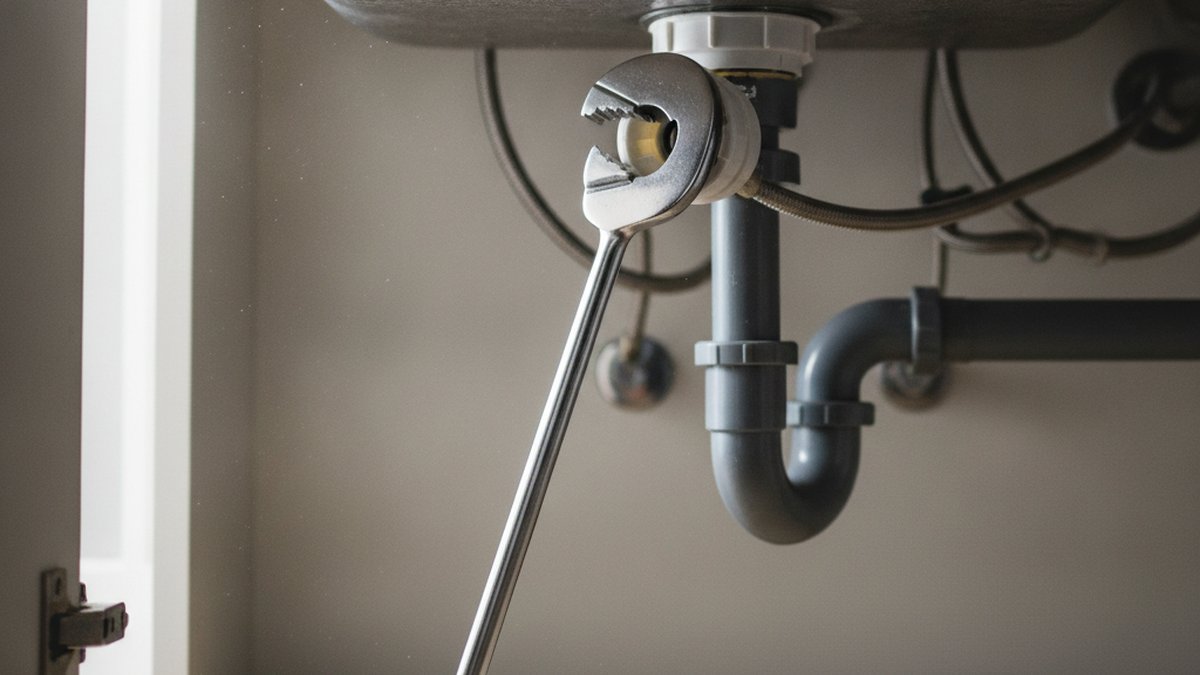
If your faucet rocks back and forth every time you turn it on, the right kitchen faucet tightening tool is almost always a basin wrench — a long-handled tool with a spring-loaded, swiveling jaw made specifically to reach the mounting nut hidden 10–14 inches up behind the sink basin where a normal wrench simply won’t fit. For a loose handle rather than a loose base, you need a hex (Allen) key to snug the set screw. Below, I’ll walk you through exactly which tool fixes which kind of “loose,” what sizes to buy, and how to use them without stripping anything or calling a plumber.
I’ve installed and serviced hundreds of faucets, and the single most common reason people think they need a whole new faucet is a mounting nut that backed off by a quarter turn. That’s a five-minute fix with the right tool — not a replacement.
Why is my kitchen faucet loose and wobbly at the base?
A faucet gets loose at the base because the mounting nut underneath the sink has vibrated and worked its way loose over months of use — not because the faucet is broken. Every time you push the handle or pull the sprayer, you put a tiny sideways load on the faucet body. Over hundreds of cycles, that torque slowly backs the nut off the threaded shank, and the whole faucet starts to rock.
There are really only three causes worth knowing about:
- Loosened mounting nut — by far the most common. The nut under the deck that clamps the faucet to the countertop has backed off. Fixed with a basin wrench.
- Loose handle set screw — the handle spins or lifts but the base is solid. The tiny grub screw holding the handle to the valve stem has loosened. Fixed with a hex key.
- Failed rubber gasket or worn deck plate — the base seal under the faucet has flattened or torn, so even a tight nut can’t stop movement. This one needs a new gasket, not just tightening.
Figure out which “loose” you have first — grab the spout and wiggle it, then grab the handle separately. If the whole thing rocks, it’s the base nut. If only the handle moves, it’s the set screw. This 10-second test saves you from grabbing the wrong tool.
What kitchen faucet tightening tool do I need for the mounting nut?
You need a basin wrench for the mounting nut — full stop. A basin wrench (also called a sink wrench or “plumber’s helper” in some regions) has a long shaft and a pivoting jaw that reaches up into the cramped space behind the sink and grips the nut at an angle no other tool can manage. Standard adjustable wrenches and channel-lock pliers physically cannot reach that nut on most kitchen sinks.
Here’s how the common tools stack up for this specific job:
| Tool | Best for | Reaches deep nut? | Typical price |
|---|---|---|---|
| Basin wrench | Mounting nut under the deck | Yes — designed for it | $12–$25 |
| Adjustable (crescent) wrench | Supply-line nuts near the front | Rarely — too short | $10–$20 |
| Water-pump / channel-lock pliers | Shallow nuts, exposed fittings | No | $15–$30 |
| Faucet nut wrench (multi-slot) | Plastic mounting nuts with tabs | Sometimes, if space allows | $8–$15 |
| Hex / Allen key set | Handle set screws | N/A — handle only | $5–$12 |
Many modern faucets — including most iVIGA pull-down and single-handle models — use a large plastic mounting nut with molded wings you can often turn by hand or with a purpose-made faucet nut wrench. But for older brass hex nuts, or any nut that’s seized, the basin wrench is the tool that will actually break it loose and re-torque it.
If you’re already under there and discover the faucet is beyond saving, our guide on how to remove an old kitchen faucet the right way walks through the same tools for full removal rather than just tightening.
How do I tighten a kitchen faucet under the sink step by step?
To tighten a loose kitchen faucet, shut off the water, clear out the cabinet, locate the mounting nut on the threaded shank, and turn it clockwise with a basin wrench until the faucet stops rocking — usually a quarter to half turn is all it takes. Here’s the full sequence:
- Turn off the shutoff valves under the sink (turn clockwise until snug). You don’t strictly need to for tightening, but it’s cheap insurance if a supply line gets bumped.
- Empty the cabinet and lay down a towel. Bring a flashlight or headlamp — visibility is half the battle down there.
- Find the mounting nut. Look straight up the faucet’s tailpiece where it passes through the sink deck. The nut sits against the underside of the countertop or sink.
- Position the basin wrench. Set the jaw so it grips the flats of the nut, with the handle hanging down where you can reach it.
- Turn clockwise. Righty-tighty from below still means clockwise as viewed from above. Snug it firm but don’t gorilla it — over-tightening cracks plastic nuts and crushes gaskets.
- Re-check from above. Wiggle the spout. If it’s still moving, give the nut another eighth turn. If the base seal looks flattened or the faucet moves even when the nut is tight, replace the gasket.
A quick warning on plastic nuts: hand-tight plus a quarter turn with the wrench is plenty. These aren’t meant to be torqued like a lug nut, and cranking them is the number-one way people crack a mount and turn a free fix into a $150 replacement.
What tool tightens a loose kitchen faucet handle instead of the base?
A loose kitchen faucet handle is tightened with a hex (Allen) key, not a wrench — the handle is held on by a small set screw, and you almost never touch the base nut for this problem. On single-handle faucets the set screw hides under the handle, either behind the lever, under a decorative cap, or beneath the base collar.
To fix it:
- Find the set screw. Pop off any button cap (often a red/blue hot-cold indicator) with a small flathead to expose it.
- Insert the correct hex key. Most faucet set screws are metric — 2.5 mm, 3 mm, or 4 mm are the usual suspects, so buy a set that includes both metric and SAE sizes.
- Turn clockwise until the handle stops lifting or spinning. Snug, not forced — the screw seats against a flat on the valve stem.
If the handle keeps loosening no matter how tight the screw is, the stem flat may be worn or stripped, which points to a cartridge or handle replacement. The mechanics overlap heavily with our shower guide on how to replace a shower faucet handle in under an hour — same set-screw logic, just a different fixture.
Can I tighten a kitchen faucet without a basin wrench?
Yes, you can sometimes tighten a kitchen faucet without a basin wrench — but only if it uses a modern plastic wing nut you can reach and turn by hand, or if you have a telescoping faucet nut wrench. For traditional metal nuts set deep behind a sink, there’s no reliable substitute, and improvising with pliers usually ends in skinned knuckles and a rounded-off nut.
Your realistic no-basin-wrench options:
- Hand-tighten the wing nut. Many faucets from the last decade, iVIGA included, are engineered for tool-free install. If you can get two fingers on the wings, you can often re-snug it without any tool.
- Use a faucet-and-sink installer tool. These slim, multi-slot tools fit the tabs on plastic nuts and give you leverage in tight spots.
- Borrow reach with long-nose pliers only as a last resort, and only if the nut is shallow. Expect frustration.
Honestly, a basin wrench is $12–$25 and will outlive your faucet. If you own a home, it belongs in your kit next to the tools you’d use to fix a kitchen faucet drip — both are jobs a homeowner can knock out in under 30 minutes.
How tight should a kitchen faucet mounting nut be?
A kitchen faucet mounting nut should be hand-tight plus roughly a quarter to half turn with a wrench — firm enough that the faucet doesn’t rock, but not so tight that you crush the gasket or crack a plastic nut. There’s no torque spec printed on the box for a reason: the “right” tightness is simply “the spout no longer moves.”
A few field-tested rules:
- Tighten in small increments and re-check the wiggle test after each. It’s easy to overshoot.
- If the faucet still moves after the nut is genuinely tight, the problem is the gasket or deck plate — stop tightening and replace the seal instead.
- Re-check the nut a week after installing a new faucet. New gaskets compress slightly and nuts settle, which is why some faucets feel loose again shortly after install.
Chasing tightness on a bad gasket is a losing game — you’ll crack the mount long before the wobble stops. And while you’re under there, if the flow seems weak, a loose or clogged aerator is often the culprit; our breakdown of kitchen faucet low water pressure covers that fix too.
Which faucets are easiest to keep tight over the years?
The faucets easiest to keep tight are single-hole, single-handle models with a metal (not plastic) mounting bracket and a solid brass body, because a rigid mounting system resists the vibration that loosens nuts in the first place. Cheap zinc-alloy faucets with thin plastic hardware are the ones that go wobbly fastest.
When you’re shopping, look for these traits that translate directly into “stays tight”:
- Metal mounting hardware or a threaded metal shank rather than an all-plastic clamp.
- A solid brass body — heavier, more rigid, and it holds threads better over a decade of use.
- A wide base gasket or deck plate that spreads the clamping load so the faucet can’t pivot.
- Tool-free or captive mounting nuts that are easy to re-snug without crawling under with a wrench.
If you’re weighing durability before you buy, our guide to the best kitchen faucet for durable everyday use digs into materials and mounting systems in detail. A faucet that’s built right barely ever needs the tightening tools above — which is the whole point.
FAQ
What is a basin wrench used for on a kitchen faucet?
A basin wrench is used to reach and turn the mounting nut located deep behind the sink basin, in a space too tight for any standard wrench. Its long shaft and pivoting jaw let you grip and tighten (or loosen) that nut from below without removing the whole sink, which is why it’s the go-to kitchen faucet tightening tool for a wobbly base.
What size Allen key do I need for a kitchen faucet handle?
Most kitchen faucet handle set screws take a metric hex key in the 2.5 mm to 4 mm range, with 3 mm being the most common. Buy an inexpensive set that includes both metric and SAE sizes so you’re covered regardless of brand — trying to force the wrong size will round out the tiny screw head.
Why does my kitchen faucet keep coming loose after I tighten it?
If it keeps loosening, the mounting nut isn’t the real problem — you likely have a worn or flattened base gasket, or a handle set screw seating on a stripped valve-stem flat. Tightening harder won’t help and may crack the nut; replace the gasket for a loose base, or replace the cartridge/handle if the handle itself won’t stay put.
Can I tighten a kitchen faucet without turning off the water?
Yes, tightening the mounting nut or handle set screw doesn’t open the water system, so you can do it with the water on. That said, shutting the two under-sink valves first is smart insurance — it takes ten seconds and protects you if a supply line gets bumped while you’re working in the cramped cabinet.
Is a faucet nut wrench the same as a basin wrench?
No. A basin wrench is a long-handled tool with a swiveling jaw for reaching deep hex nuts, while a faucet nut wrench (or faucet-and-sink installer tool) is a slim multi-slot tool made for the winged plastic nuts on modern faucets. Many homeowners keep both, since the plastic-nut tool is faster when it fits and the basin wrench handles everything it can’t.
How much does a kitchen faucet tightening tool cost?
A basin wrench runs about $12–$25, a hex key set is $5–$12, and a plastic faucet nut wrench is $8–$15. For under $40 total you’re equipped to fix nearly any loose faucet at home — far less than a single plumber visit, which typically starts around $100–$150.
A note on expertise and standards
About the author: This guide was written by the iVIGA product team, drawing on hands-on installation and service experience across single-hole, widespread, and pull-down kitchen faucets. We’ve torqued a lot of mounting nuts and stripped enough set screws early in our careers to know exactly where beginners go wrong.
About iVIGA: iVIGA designs and manufactures kitchen and bathroom faucets with solid brass bodies and metal mounting hardware engineered to stay tight over years of daily use. Our faucets are built and tested to recognized industry standards — including cUPC and NSF/ANSI 61 compliance for drinking-water safety — and are cycle-tested for durability, then backed by a limited lifetime warranty on the finish and function. When a fixture is built and mounted right, the only tightening tool you’ll reach for is the one that came in the box.
WeChat
Scan the QR Code with WeChat