 iVIGA Faucet Manufacturer & Factory

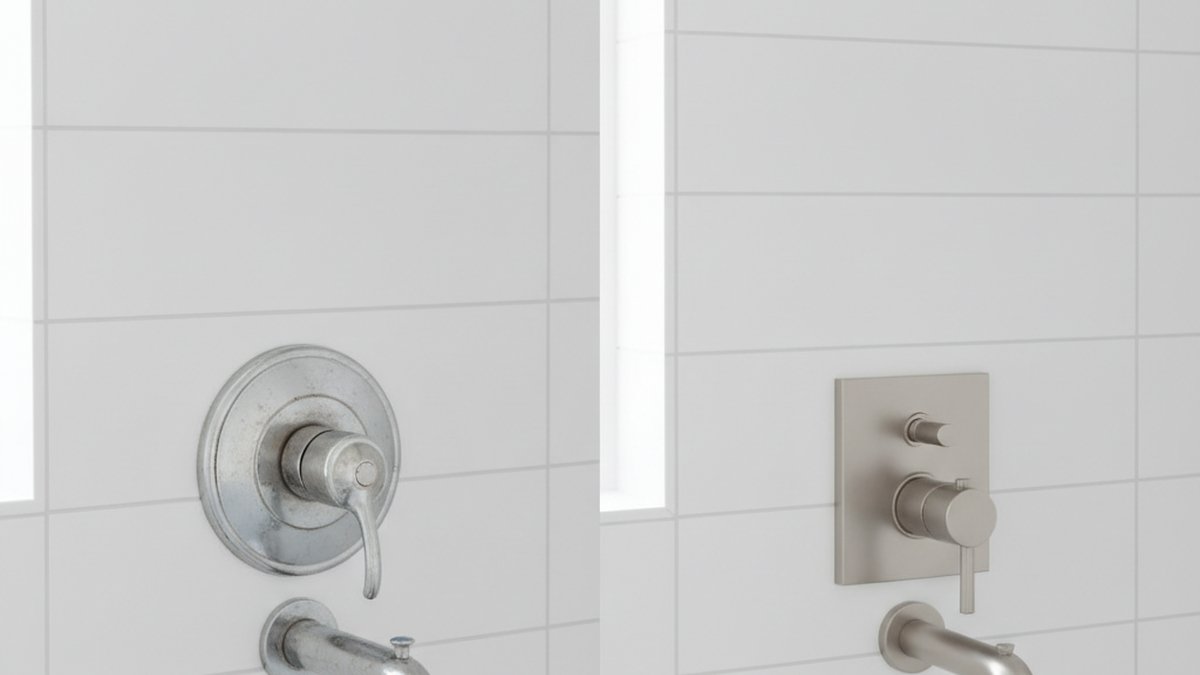
A shower faucet upgrade means replacing your shower’s trim (the handle, escutcheon, and shower head you actually see and touch) and often the valve behind the wall that controls water flow and temperature. Done right, it fixes cold-then-scalding temperature swings, ends that annoying drip, and instantly modernizes the whole shower — usually for less than the cost of a single plumber’s callout on a bigger job. Below, we’ll walk through exactly when it’s worth it, what parts you need, how much it costs, and how to pick the right valve and finish so you buy once and buy right.
When is a shower faucet upgrade actually worth the money?
It’s worth it the moment your shower does any of these three things: swings temperature when someone flushes a toilet, drips or leaks after you shut it off, or simply looks dated compared to the rest of your bathroom. Those are all signs the internal valve cartridge is worn or the valve technology is outdated — and no amount of cleaning fixes that.
Here’s the honest breakdown. If your only complaint is looks, a “trim-only” upgrade (new handle, plate, and shower head that clip onto your existing in-wall valve) costs $60–$200 and takes under an hour — a genuinely great return. If you’re getting temperature swings or scalding when appliances run, that’s a valve problem, and upgrading to a pressure-balanced or thermostatic valve is a safety improvement, not a luxury. The one case where you should pause: if your existing valve is a discontinued off-brand and you can’t find matching trim, you may need to open the wall to swap the whole valve body, which pushes the job toward $250–$500 with a plumber. Even then, most homeowners find it worth it because they’re fixing a daily annoyance for years to come.
A quick way to decide: if the fix is cosmetic or the parts are readily available, DIY it this weekend. If water is coming out at unpredictable temperatures, upgrade the valve — your skin will thank you.
What are the different types of shower faucet valves, and which one do I need?
There are four main valve types, and for most homes today the right answer is a pressure-balancing valve (the modern default) or a thermostatic valve (the premium, most stable option). Here’s how they stack up so you can match one to your bathroom and budget.
| Valve Type | How It Works | Temperature Stability | Best For | Typical Price |
|---|---|---|---|---|
| Pressure-balancing | Balances hot/cold pressure so a flush doesn’t spike the temp | Good — protects against sudden scalding | Most homes; the modern standard | $90–$200 |
| Thermostatic | Holds an exact set temperature regardless of pressure changes | Excellent — dial to a precise degree | Families, luxury showers, multiple outlets | $180–$400+ |
| Diverter / multi-function | Routes water between shower head, hand shower, or body jets | Depends on paired valve | Showers with a hand shower or spa setup | $120–$350 |
| Manual mixing (older) | Simple hot/cold mix, no compensation | Poor — swings with pressure | Not recommended for new upgrades | $40–$90 |
Most single-handle showers built or renovated in the last 20 years use a 1/2″ pressure-balanced valve, so a like-for-like upgrade is straightforward. If you have young kids or elderly family members, a thermostatic valve is the upgrade to reach for — it locks in a safe max temperature and delivers the exact warmth you dialed in, every time. If you’re already committed to opening the wall, this is the moment to step up to thermostatic, because you’re paying for the labor either way. For a deeper walkthrough of swapping the valve itself, see our guide on how to change a shower thermostatic valve without flooding the bathroom.
Can I upgrade a shower faucet myself, or do I need a plumber?
You can absolutely do a trim-only upgrade yourself in under an hour with basic tools — replacing the handle, escutcheon plate, and shower head on an existing valve requires no soldering and no wall-opening. Swapping the entire valve body behind the wall, however, is where most people should call a plumber, because it involves cutting into the wall and connecting water supply lines.
Here’s a realistic look at what a DIY trim upgrade involves:
- Shut off the water — either at the shower’s stop valves or the home’s main.
- Remove the old handle and trim — usually one set screw (hex/Allen) under or behind the handle, then the decorative plate.
- Check the cartridge — if it’s the source of your drip, replace it now; a new cartridge is $15–$40.
- Install the new trim — slide on the new escutcheon, attach the handle, and hand-tighten the set screw.
- Swap the shower head — wrap the shower arm threads with plumber’s tape and screw on the new head.
- Turn the water back on and test for leaks and smooth temperature control.
If your handle has come loose or fallen off before you even start, our step-by-step on how to put a shower tap back on will get you to a clean starting point. And if the handle itself is the part you’re replacing, the dedicated guide on how to replace a shower faucet handle in under an hour covers the exact tools and torque so you don’t strip anything. The line to remember: if it clips onto existing plumbing, DIY it; if it connects to supply pipes, hire it out.
How much does a shower faucet upgrade cost in 2026?
Expect $60–$200 for a DIY trim-only upgrade, $150–$400 for a mid-range fixture with a new pressure-balanced valve you install yourself, and $400–$900 all-in if a plumber swaps a thermostatic valve behind the wall. The single biggest cost variable isn’t the faucet — it’s whether the wall has to be opened.
To keep the budget sensible, spend where it matters. Put your money into the valve and cartridge (the parts that determine temperature safety and how long the faucet lasts) rather than an oversized rainfall head that drains your water heater. A solid-brass valve body with a ceramic-disc cartridge will outlast a bargain zinc-alloy unit many times over. If your upgrade is partly about water pressure feeling weak, it may not be the faucet at all — check our diagnosis of low water pressure and the common Reddit fixes, since many of the same causes (clogged aerators, half-closed stops, sediment) apply to showers too.
Which finish should I choose for a shower faucet upgrade?
Choose the finish that matches the fixtures you’re keeping — the towel bars, the vanity faucet, and the shower head — because a mismatched metal is the number-one thing that makes an upgrade look unfinished. The three most popular, forgiving finishes are brushed nickel, matte black, and chrome.
- Brushed nickel — warm, hides water spots and fingerprints, works with almost any color scheme. The safest all-round pick. See our full case for it in is a brushed nickel faucet for shower really the best finish.
- Matte black — bold, modern, dramatic against light tile; shows hard-water mineral spots more, so keep a cloth handy in hard-water areas.
- Chrome — bright, budget-friendly, timeless, and the easiest to clean; it can read a little “builder-grade” but never looks wrong.
- Champagne bronze / gold — warm and upscale, best when it matches other warm-toned fixtures in the room.
One practical tip: buy your shower head, handle, and any hand shower as a coordinated set or at least in the same finish family from the same brand. Finishes labeled “brushed nickel” can vary in warmth between manufacturers, and buying a matched suite guarantees they look intentional together.
What should I look for to make sure a new shower faucet lasts?
Look for a solid-brass valve body, a ceramic-disc cartridge, and third-party certifications like cUPC and NSF/ANSI 61 — those three things separate a faucet that lasts 15+ years from one that drips within two. Everything else is styling.
Brass resists corrosion far better than the zinc alloys used in cheap fixtures, and a ceramic-disc cartridge is what gives you smooth, drip-free operation over tens of thousands of on/off cycles. Certification matters because it means the fixture was independently tested for lead-safe wetted surfaces and pressure durability, not just marketed as “quality.” iVIGA shower fixtures use solid-brass bodies and ceramic-disc cartridges and are tested against these plumbing standards, which is why they carry a multi-year warranty — a manufacturer only backs a product that long when the internals are built to survive daily use. When you compare options, ask two questions: what is the body made of, and what certifications does it carry? If a listing won’t tell you, that’s your answer.
FAQ
Do I have to open the wall to upgrade my shower faucet?
No — if you’re keeping your existing in-wall valve and just want new looks or a fresh cartridge, a trim-only upgrade clips onto what’s already there with no wall-opening required. You only need to open the wall when you’re replacing the valve body itself, for example moving from an old manual mixer to a thermostatic valve.
Will a new shower faucet fix my temperature swings when the toilet flushes?
Yes, if you upgrade to a pressure-balancing or thermostatic valve. Those swings happen because an old manual valve can’t compensate when cold water is diverted to a flushing toilet; a pressure-balanced valve holds the hot/cold ratio steady, and a thermostatic valve locks in your exact set temperature regardless of pressure changes.
Can I mix brands — a new shower head with my old valve?
You can mix shower heads freely, since they simply screw onto a standard 1/2″ shower arm. Handles and trim plates, however, are usually brand- and model-specific because they must fit that manufacturer’s cartridge and valve, so match the trim to your existing valve or plan to replace the valve too.
How long does a shower faucet upgrade take?
A trim-only DIY upgrade takes 30–60 minutes. Replacing a full valve body typically takes a plumber two to four hours, mostly because of accessing the valve, connecting supply lines, and patching the wall afterward.
What’s the difference between a shower faucet and a shower valve?
The “faucet” or trim is the visible part — the handle, plate, and shower head you touch. The valve is the mechanism behind the wall that actually mixes hot and cold water and controls flow; the trim attaches to it. An upgrade can involve just the trim, just the valve cartridge, or both.
Is a thermostatic shower valve worth the extra cost?
For families with children or elderly members, and for anyone building a shower with multiple outlets like a hand shower and body jets, yes — a thermostatic valve delivers a precise, safe, repeatable temperature and prevents scalding. For a simple single-head shower on a budget, a good pressure-balancing valve is plenty.
Author note: This guide was written by the iVIGA fixtures team, drawing on hands-on installation testing and years of manufacturing bathroom and shower faucets. iVIGA designs and produces its own solid-brass shower fixtures, tests them against recognized plumbing standards (cUPC, NSF/ANSI 61), and backs them with a multi-year warranty. Always follow your local plumbing code, and when in doubt about in-wall valve work, consult a licensed plumber.
WeChat
Scan the QR Code with WeChat