 iVIGA Faucet Manufacturer & Factory

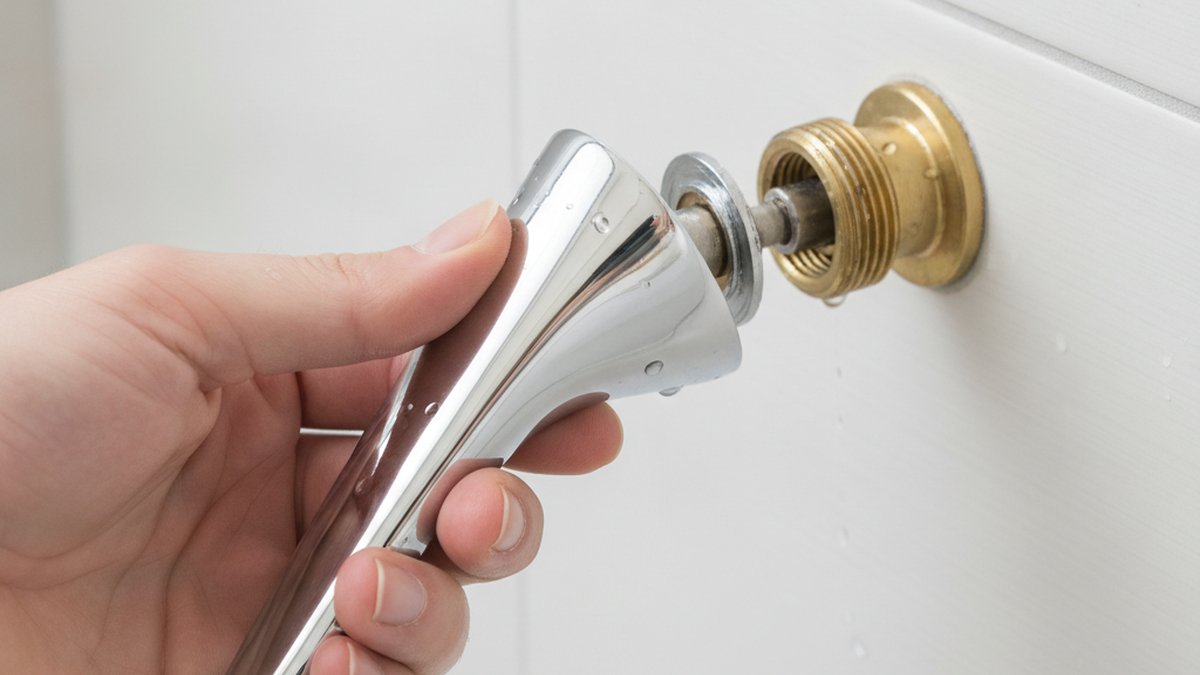
If your shower handle spun off in your hand this morning, you’re probably wondering exactly how to put a shower tap back on without calling out an emergency plumber or flooding the bathroom. Good news: in the vast majority of cases, a shower tap comes loose for one simple reason — a single set screw has backed out — and reattaching it is a genuinely easy DIY fix. Below, an iVIGA fixtures engineer walks you through it step by step, explains why it happened, and shows you how to tell the difference between “it just needs tightening” and “the valve cartridge is worn and needs replacing.”
We’ll cover the standard single-lever handle, the older two-tap (hot/cold) setup, and what to do if the whole spline stem is stripped. Let’s get your shower working again.
Why did my shower tap come off in the first place?
A shower tap almost always comes off because the grub screw (the tiny set screw that clamps the handle to the valve stem) has vibrated loose over months of use. It’s rarely a sign that anything is broken. Every time you turn the shower on and off, the handle exerts torque on that one little screw; over hundreds of cycles it slowly backs out until the handle can wiggle, then slips off entirely.
The three most common causes, in order of how often we see them:
- Loose grub/set screw — 80% of cases. The screw is still there, just backed out. Simplest fix.
- A stripped or “rounded” valve spline — the splined stem the handle grips onto has worn smooth, so the handle can’t get a grip. Common on plastic cartridge stems in hard-water areas.
- A corroded or seized cartridge — if the handle came off because you were forcing a stiff tap, the cartridge underneath may be the real problem, not the handle.
Knowing which one you have decides everything, so before you reach for a screwdriver, wiggle the exposed stem. If it turns the water on and off smoothly by hand (with pliers, gently), your valve is fine and you only need to reattach the handle.
How do you put a shower tap back on step by step?
Putting a shower tap back on takes six steps and about 10 minutes: shut off the water, expose the screw, seat the handle onto the stem, tighten the set screw, replace the cap, and test. Here’s the detailed version.
- Turn off the water supply. Ideally use the isolation valves feeding the shower (often behind an access panel or in the loft/basement). If you can’t find them, shut off the main. You usually don’t have to for a handle-only reattach, but it protects you if you accidentally knock the stem to the “on” position.
- Find the fixing screw. On modern single-lever taps it’s a small hex (Allen) grub screw on the underside of the handle. On older cross-head or lever taps it’s often hidden under a snap-off index cap marked hot/cold (red/blue) or a small chrome button — pop it off with a flathead or fingernail.
- Line up and seat the handle. Push the handle straight onto the splined stem. Most levers should sit in the “off” (usually horizontal or pointing down) position when the water is off. Seat it fully so it’s flush against the escutcheon/wall plate.
- Tighten the set screw. Turn clockwise until snug, then a touch more — firm, not gorilla-tight. Overtightening cracks the handle or strips the screw head. A 2–2.5 mm hex key fits most modern iVIGA and standard-thread handles.
- Refit the cover cap. Snap the index/decorative cap back over the screw. This isn’t just cosmetic — it keeps water out of the screw recess so it doesn’t corrode and seize.
- Turn the water back on and test. Run hot and cold, check the handle doesn’t wobble, and watch for drips around the base.
What tools do I actually need?
For 90% of shower taps you need almost nothing: a set of hex/Allen keys, a small flathead screwdriver to pop the cap, and maybe a rag. Here’s the realistic kit list depending on your handle type.
| Handle type | Fixing method | Tool you need |
|---|---|---|
| Modern single-lever | Hex grub screw under handle | 2–2.5 mm Allen key |
| Cross-head / traditional | Screw under red/blue index cap | Flathead + Phillips screwdriver |
| Metal lever (older brass) | Slotted grub screw on collar | Small flathead screwdriver |
| Push-fit designer handle | Snaps on / small side screw | Fingers or 1.5 mm hex key |
If your handle uses a hidden cap, don’t lever too hard — the index caps on quality mixers are a friction fit and pop off with light pressure. Gouging at them scratches the finish, which matters if you’ve invested in a premium look like a brushed nickel shower faucet where the finish is the whole point.
What if the shower tap won’t stay on or keeps slipping?
If you’ve tightened the screw but the handle still slips or spins freely, the splined stem is stripped — the fine teeth the handle grips onto have worn smooth, so nothing can bite. This is the second-most-common scenario and, unfortunately, tightening harder won’t fix it.
Here’s how to confirm and what to do:
- Pull the handle off and look at the stem. Healthy splines look like a tiny gear with sharp ridges. A stripped one looks rounded, shiny, or has flat spots.
- Check the inside of the handle too. On plastic handles, the internal splines often strip before the metal stem does. If the handle bore looks chewed up, a new handle alone may fix it.
- Temporary fix: a wrap of PTFE (plumber’s) tape around the stem can pack the gap enough to get a few more weeks out of it — but treat it as a stopgap, not a repair.
- Real fix: replace the cartridge (which includes the stem) or the whole handle assembly. This is a slightly bigger job, and our full guide on how to replace a shower faucet handle yourself walks through it in under an hour.
The key thing: a stripped stem is a wear item, not a defect. In hard-water homes, mineral buildup accelerates it, and a plastic cartridge stem will always give out before a solid brass one — which is exactly why iVIGA specs brass cartridge stems on our thermostatic and single-lever shower valves.
My handle came off and now water won’t stop — what do I do?
If water is running and won’t shut off after the handle came off, immediately turn off the water at the isolation valve or main stopcock, then reattach or grip the exposed stem to close it. When a handle detaches while the water is on, the stem is stuck in the open position; you can usually rotate the bare stem back to “off” with a pair of pliers (wrap the jaws in a cloth so you don’t score the metal). Once the water’s off, reattach the handle following the six steps above. If the stem itself won’t turn even with pliers, the cartridge has seized — that’s a cartridge replacement, covered in our guide to changing a shower thermostatic valve without flooding the bathroom.
Single-lever vs two-tap: does putting the tap back on differ?
The process is the same in principle — seat, screw, cap — but the details differ. On a single-lever mixer you’re dealing with one handle and one set screw; on a traditional two-tap (separate hot and cold) setup, each tap head reattaches independently, and you have to get the hot and cold on the correct sides.
Quick orientation tips:
- Single-lever: the lever position tells you the state. Reattach with the lever in the closed position and the spline aligned so “up/left” gives you hot, matching your old muscle memory.
- Two-tap: reattach each head so both close by turning clockwise and open by turning anti-clockwise, and both handles sit at the same angle when off. Get the red cap on hot, blue on cold.
- Concealed/valve-in-wall: the trim escutcheon may need to come off first; make sure the wall plate is seated and sealed before you refit the handle.
If you’re upgrading rather than repairing — say the old handle is beyond saving — this is a good moment to consider a matched set. A modern shower system with a rain head and handheld uses standardized cartridge stems that make future handle reattachment far easier, because replacement parts are still made.
How do I stop the shower tap from coming off again?
To stop a shower tap coming loose again, tighten the set screw properly, keep the cover cap on to block corrosion, and add a dab of removable thread-locker to the screw threads. That combination fixes the root cause — a screw that vibrates out over time.
Longer-term prevention:
- Use blue (removable) thread-locker, never red (permanent). One small drop on the grub screw keeps it snug through years of use but still lets you undo it later.
- Don’t over-torque the handle in daily use. If you’re cranking the tap hard to stop a drip, the cartridge is worn — fix that instead of muscling the handle, which is what loosens screws and strips splines.
- Descale annually in hard-water areas. Limescale around the stem forces the handle to sit proud, which puts leverage on the screw.
- Replace like-for-like quality. A brass stem and a stainless or brass set screw resist the corrosion-then-slip cycle far better than pot-metal budget parts.
When is it actually time to replace instead of reattach?
Reattach when the stem is intact and the tap still shuts off cleanly; replace when the stem is stripped, the cartridge is seized, or the tap drips even when fully closed. A dripping tap that won’t stop is telling you the internal seals are gone — no amount of handle-tightening fixes that. If you’re chasing a persistent drip, our walkthrough on fixing a faucet drip yourself covers the same cartridge-and-seal logic that applies to showers.
Quick reference: reattach vs repair vs replace
| Symptom | Likely cause | Action | Time |
|---|---|---|---|
| Handle wobbles or slips off | Loose grub screw | Reattach + tighten | ~10 min |
| Handle spins freely, won’t grip | Stripped spline | New handle or cartridge | 30–45 min |
| Handle stiff, hard to turn | Seized cartridge | Replace cartridge | 45–60 min |
| Drips when fully off | Worn seals/cartridge | Replace cartridge | 45–60 min |
| Water won’t shut off at all | Cartridge failure | Shut off main, replace | 1 hr+ |
If your symptom is in the top row, you’re in luck — you’re just putting the tap back on. Everything below that row is a parts job, but still comfortably DIY for most people with basic tools.
FAQ
Do I need to turn off the water to put a shower tap back on?
Not strictly, if you’re only reattaching a handle to an intact stem — but it’s smart to. The risk is knocking the bare stem into the “on” position while you work. If your isolation valves are easy to reach, take the 30 seconds to shut them; if not, at least make sure the stem is in the closed position before you start.
What size Allen key fits a shower tap grub screw?
Most modern single-lever shower taps use a 2 mm or 2.5 mm hex grub screw; some traditional and imperial-sized handles use 3 mm or a 1/8-inch key. Buy a small metric-and-imperial hex set — it costs a few dollars and covers virtually every faucet handle you’ll ever meet.
Can I put a shower tap back on without any screw at all?
Only if it’s a push-fit designer handle, which snaps directly onto the spline. Screwed handles need their set screw — if it’s gone, don’t run the shower with a loose handle, because the stem can shoot to full-hot and scald you. Order a replacement grub screw (they’re cheap and standardized) or take the old one to a hardware store to match the thread.
Why does my shower handle keep coming loose even after I tighten it?
Either the set screw itself is worn (rounded head, won’t bite), the stem splines are stripped so the handle never fully locks, or vibration keeps backing the screw out. Try a fresh screw plus a drop of blue thread-locker first; if it still slips, the spline is worn and you’ll need a new handle or cartridge.
Is putting a shower tap back on a job I can do myself, or do I need a plumber?
Reattaching a handle is firmly a DIY job — no pipework, no soldering, just a hex key and ten minutes. You’d only want a plumber if the cartridge has seized, the valve is leaking inside the wall, or you can’t isolate the water. For everything up to and including a cartridge swap, most homeowners handle it themselves.
Will a stripped stem ruin the whole shower valve?
No — the stem is part of the replaceable cartridge, not the valve body buried in the wall. You swap the cartridge (stem included) and the valve is as good as new. That’s why cartridge-based mixers are worth buying: the expensive part stays, and the wear part is a low-cost replacement.
About the author: This guide was written by the iVIGA product engineering team, who design and bench-test shower valves, cartridges, and handle assemblies. Our test lab cycles every cartridge tens of thousands of open-close operations to validate the spline and set-screw retention you rely on when you reattach a handle.
About iVIGA: iVIGA (www.viga.cc) manufactures faucets, shower systems, and bathroom fixtures with solid-brass cartridge stems and finishes tested against corrosion and hard-water wear. Our shower valves are built to recognized plumbing standards (including cUPC and NSF/ANSI 61 material compliance) and backed by a multi-year warranty, so replacement handles and cartridges stay available and interchangeable for years after purchase.
WeChat
Scan the QR Code with WeChat