 iVIGA Faucet Manufacturer & Factory

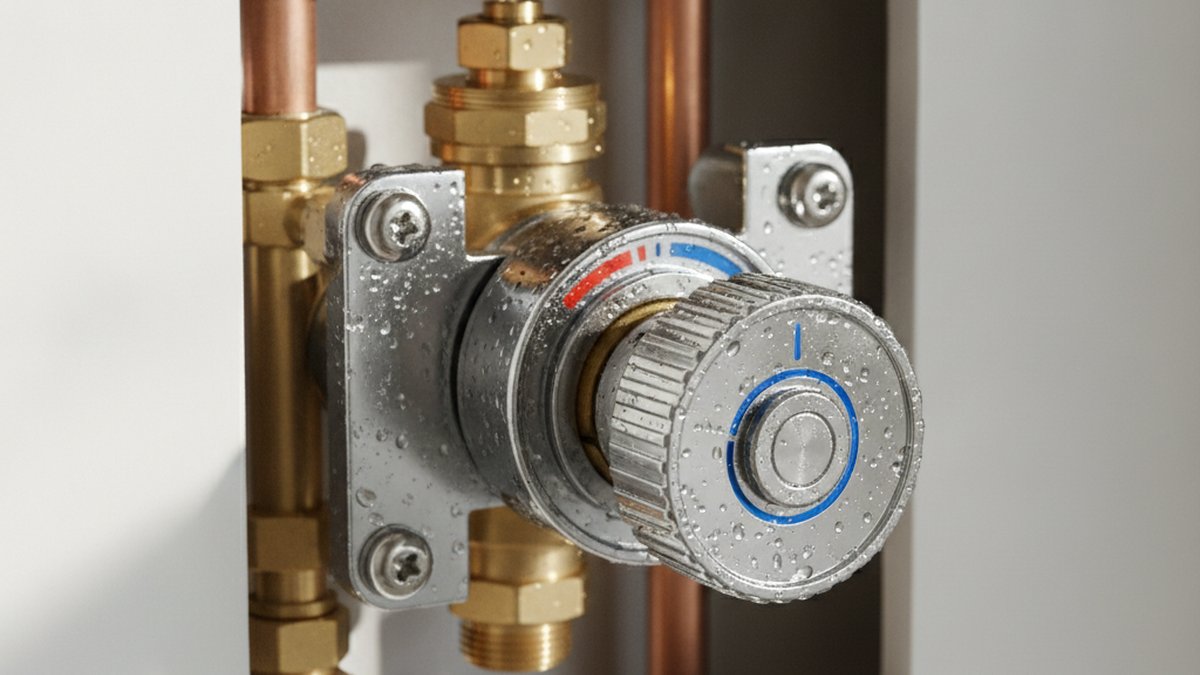
Learning how to change a shower thermostatic valve is one of those jobs that sounds terrifying and turns out to be very doable — as long as you correctly identify whether you’re replacing just the internal cartridge or the entire brass valve body buried in the wall. Those are two completely different projects, and the biggest mistake DIYers make is starting to unscrew things before they know which one they’re facing. In this guide I’ll walk you through both, step by step, with the exact numbers, tools, and gotchas that decide whether you finish in 40 minutes or spend the weekend fighting a soldered connection.
What Exactly Is a Thermostatic Shower Valve, and Why Do They Fail?
A thermostatic shower valve is the temperature-controlling heart of your shower — it uses a wax or bimetal element inside a cartridge to automatically blend hot and cold water to a set temperature, and it shuts flow down if the cold supply drops so you don’t get scalded. They fail for three common reasons: mineral scale locking up the wax element, worn internal seals causing leaks or temperature drift, and the whole thing simply aging out after 8–15 years of hard-water abuse.
Here’s the part that saves you money: about 80% of “broken thermostatic valve” problems are actually a bad cartridge, not a bad valve body. If your shower suddenly runs only lukewarm, swings hot and cold, or won’t shut off fully, the cartridge is the first suspect. The valve body — the brass housing plumbed into your pipes — rarely fails unless it’s cracked or corroded through. So before you cut open a wall, diagnose which part is actually dead.
- Temperature won’t reach hot anymore: almost always a scaled or failed cartridge.
- Water dribbles from the head even when off: worn cartridge seals, sometimes a bad diverter.
- Visible drip or corrosion behind the wall / green staining: possible valve body failure — inspect closely.
- Handle spins freely with no effect: broken cartridge stem or stripped splines.
Do You Need to Replace the Whole Valve or Just the Cartridge?
Replace only the cartridge if your valve body is sound and you can get a matching part — this is the case roughly 8 out of 10 times, and it’s the easy 30–45 minute job. Replace the entire valve body only if it’s cracked, corroded, leaking behind the wall, or if you’re switching to a completely different brand or configuration. The table below lays out the honest difference so you can decide before you buy anything.
| Factor | Cartridge Swap Only | Full Valve Body Replacement |
|---|---|---|
| Typical time | 30–45 minutes | 2–4 hours (more if tiled) |
| Skill level | Beginner DIY | Advanced DIY / plumber |
| Wall access needed | No — works through the trim opening | Usually yes — access panel or cut tile |
| Plumbing (solder/PEX/press) | None | Often required |
| Typical part cost | $25–$90 | $120–$350 + labor |
| Best when | Same brand, body is fine | Cracked body, brand change, remodel |
One rule that matters more than any other: thermostatic cartridges are not universal. A Grohe cartridge won’t drop into a Hansgrohe body, and a generic Amazon cartridge may physically fit but throw off your temperature calibration. Match the brand and the exact model number stamped on the old cartridge or printed in your valve’s spec sheet. If you’re moving to a new brand entirely, you’re replacing the body too — there’s no shortcut around that.
What Tools and Parts Do You Need Before You Start?
You need very little for a cartridge swap: an adjustable wrench, an Allen/hex key set, a Phillips screwdriver, plumber’s grease, and the correct replacement cartridge. For a full valve body replacement you add pipe-cutting and joining tools. Gather everything first — nothing is worse than standing in a wet shower with the water off, realizing you’re missing a hex key.
- Correct replacement cartridge or valve body (matched to your model number).
- Adjustable wrench and a set of hex/Allen keys.
- Phillips and flat screwdrivers.
- Needle-nose pliers or a cartridge puller tool (some brands sell a dedicated one).
- Silicone plumber’s grease (never petroleum jelly — it degrades rubber seals).
- White vinegar or a descaler for cleaning mineral buildup.
- Old towels and a small bucket for residual water.
- For full body swaps: pipe cutter, PTFE tape, and solder/press/PEX fittings as your plumbing requires.
A quick tip from years around fixtures: take a clear photo of the old cartridge and the numbers stamped on it before you leave for the hardware store. That single photo prevents the most common return trip. If you’re also upgrading the parts you can actually see — the handle or trim plate — our guide on how to do a faucet handle replacement yourself covers the trim side of the job in the same plain-language style.
How Do You Actually Change the Thermostatic Valve — Step by Step?
Shut off the water, remove the trim, pull the old cartridge, clean the housing, fit the new part with grease, reassemble, and reset the temperature stop — in that order. Here’s how each step really goes, including the parts nobody warns you about.
Step 1 — Shut off the water and protect the drain
Turn off the water supply. Some thermostatic valves have built-in integral stops (small screws on the face of the valve you turn with a flathead) — use those if you have them. If not, shut off the bathroom branch line or the whole-house main. Then open the shower handle to bleed residual pressure, and cover the drain with a rag or a cup so no small screws vanish down it. This last step has saved more cartridges than any tool.
Step 2 — Remove the handle and trim plate
Pop the decorative cap off the handle, undo the set screw with your hex key, and pull the handle straight off. Remove the escutcheon (the round trim plate) — usually two screws or a threaded collar. Behind it you’ll find the valve face, a retaining clip or a large brass bonnet nut, and the cartridge. Keep every screw in a labeled cup.
Step 3 — Extract the old cartridge
Remove the retaining clip (pull it straight up with needle-nose pliers) or unscrew the bonnet nut with your adjustable wrench. Then pull the cartridge out. If it’s fused with limescale — very common in hard-water areas — wiggle it gently while pulling, or use the brand’s cartridge puller. Don’t lever against the plastic housing or crank on it wildly; you can crack the valve body and turn a 40-minute job into a wall-opening one.
Step 4 — Clean and inspect the housing
Wipe the inside of the valve body, soak away any scale with white vinegar, and check the seats and O-rings. If the body is smooth and uncracked, you’re doing a cartridge swap. If you see cracks, deep pitting, or a leak behind the body, stop — you need a full valve body replacement, which means opening wall access.
Step 5 — Fit the new cartridge (or valve body)
Coat the new cartridge’s O-rings with a thin film of silicone plumber’s grease, then push it in aligned exactly as the old one sat (many cartridges have a keyed tab or a “hot side” mark — get this right or hot and cold reverse). Refit the clip or bonnet nut. For a full body replacement, this is where you’d cut the old body out and solder, press, or PEX-connect the new one — a job that genuinely benefits from a pro if you’re not comfortable making watertight pipe joints inside a wall.
Step 6 — Reassemble, restore water, and reset the temperature limit
Reinstall the trim and handle. Turn the water back on slowly and check for leaks. Now the step people forget: reset the anti-scald temperature limit stop. Run the shower, let it stabilize, measure the max temperature with a thermometer, and adjust the limit-stop ring so it caps at a safe 100–104°F (38–40°C) — the industry standard for a comfortable, scald-safe maximum. Skip this and your “fixed” shower may run cold or dangerously hot.
How Long Does It Take and When Should You Call a Plumber?
A same-brand cartridge swap takes a confident DIYer 30–45 minutes; a full valve body replacement behind tile is a 2–4 hour job and a fair reason to call a plumber. Call a pro if any of these are true: the valve body is cracked or leaking behind the wall, your pipes are copper and need soldering, the valve is buried behind tile with no access panel, or you simply aren’t comfortable turning the water back on and trusting your own joints.
There’s no shame in that line. Water damage inside a wall is expensive — a $150 plumber visit is cheaper than replacing drywall, framing, and the ceiling below. But if it’s a cartridge, and the body is sound, this is squarely a Saturday-morning DIY win. If your project is really about repositioning the shower rather than fixing temperature, read how to change a shower head location without ripping open the whole wall first — you may not need to touch the valve at all.
Should You Upgrade the Whole Shower System While the Wall Is Open?
If you’re already replacing the entire valve body — meaning the wall is open anyway — it’s often the smartest time to upgrade to a modern shower system rather than reinstalling a single spout. The incremental labor is small when the access is already there, and a thermostatic system with a rain head plus handheld gives you far more everyday function for a modest cost bump.
This only applies to full-body replacements; if you’re doing a simple cartridge swap, leave the good hardware alone. But for anyone cutting into the wall, it’s worth comparing options — our breakdown of which shower system with rain head and handheld to buy in 2026 walks through valve compatibility and flow rates. And if you’re refreshing the finish at the same time, choosing the right shower finish like brushed nickel helps you match the trim to the rest of the bathroom.
Common Mistakes That Turn a 40-Minute Job Into a Weekend
The three mistakes that cause the most grief are: buying a non-matching cartridge, forgetting to reset the temperature limit, and levering a scaled cartridge hard enough to crack the body. Avoid those three and you’ve avoided 90% of the disasters.
- Wrong part: generic cartridges “fit” but mis-calibrate temperature. Match the model number.
- Reversed hot/cold: the cartridge is keyed — install it in the same orientation as the old one.
- No grease or wrong grease: silicone plumber’s grease only; petroleum products swell and destroy rubber seals.
- Skipping the limit reset: leaves you with lukewarm or scalding water after a “successful” swap.
- Forcing a limed-up cartridge: soak in vinegar and use the proper puller instead of brute force.
Author Note & Why You Can Trust This Guide
This guide was written by the iVIGA fixtures team, drawing on hands-on installation experience and product testing across thousands of thermostatic valves. iVIGA (at www.viga.cc) designs and manufactures faucets, shower systems, and bathroom fixtures, and our thermostatic cartridges are pressure- and temperature-cycle tested to hold a stable blend and to shut down flow if the cold supply fails — the core anti-scald safety behavior required by standards like ASSE 1016 / cUPC. Our shower valves are backed by a manufacturer’s warranty, and we build to the certifications (cUPC, NSF/ANSI 61) that reputable North American plumbing codes expect. We write these guides to help you make the right call — DIY when it’s genuinely a DIY job, and call a pro when it isn’t.
FAQ
Can I replace a thermostatic shower cartridge myself?
Yes — if the valve body behind the wall is sound and you can get the exact matching cartridge, replacing it yourself is a beginner-friendly 30–45 minute job needing only hand tools, grease, and the correct part. Replacing the whole valve body is the advanced job that often needs a plumber.
How do I know if my thermostatic valve or just the cartridge is bad?
If the shower runs lukewarm, swings temperature, or won’t shut off but there’s no leak behind the wall, it’s almost always the cartridge. If you see cracks, corrosion, green staining, or water leaking behind the valve body itself, the body has failed and needs full replacement.
Do I have to turn off the water at the main to change it?
Not always. Many thermostatic valves have built-in integral stop screws on the valve face that isolate just that shower. If yours doesn’t, shut off the bathroom branch line or the whole-house main. Always bleed the line by opening the handle afterward.
Why is my new thermostatic valve running cold or too hot after installation?
You most likely skipped resetting the temperature limit stop, or the cartridge is installed with hot and cold reversed. Reset the limit-stop ring to cap around 100–104°F, and confirm the cartridge’s keyed tab matches the original orientation.
How much does it cost to replace a shower thermostatic valve?
A DIY cartridge swap costs roughly $25–$90 for the part. A full valve body replacement runs $120–$350 for the part plus $150–$400 in plumber labor if you don’t do it yourself, mostly depending on whether tile has to be cut for access.
How long do thermostatic shower valves last?
A quality thermostatic valve body lasts 15–25 years, while the internal cartridge typically needs replacing every 8–15 years — sooner in hard-water areas where scale builds up. Periodic descaling and using a water softener meaningfully extends cartridge life.
WeChat
Scan the QR Code with WeChat