 iVIGA Faucet Manufacturer & Factory

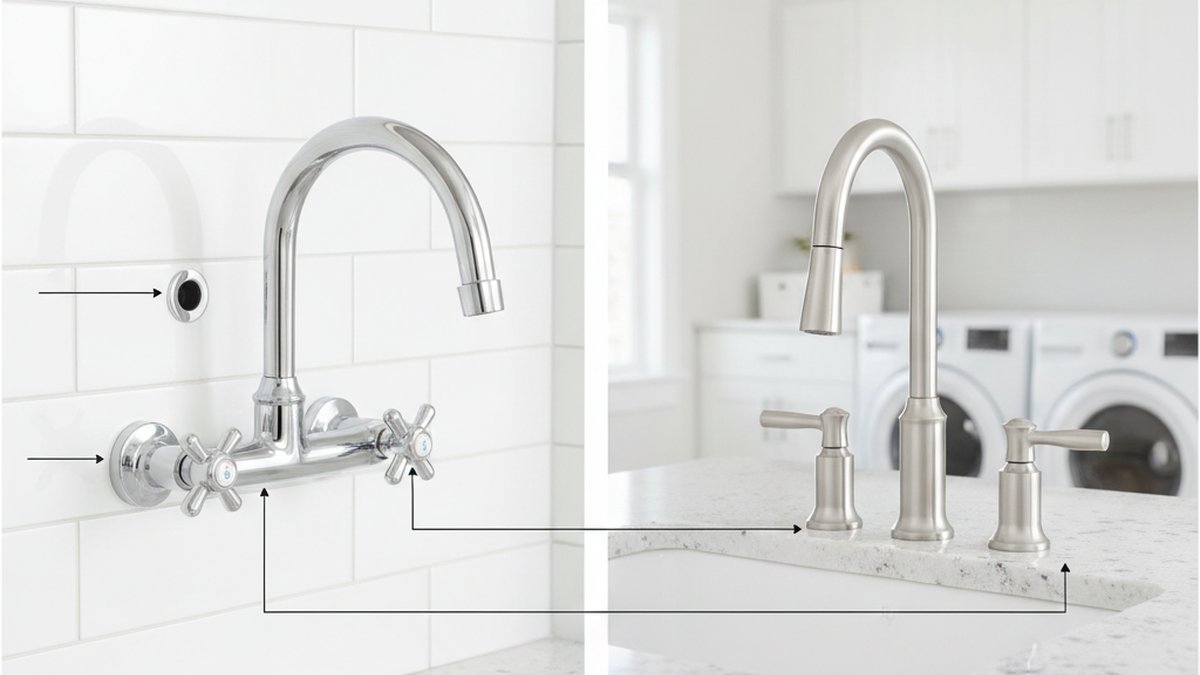
If you’ve ever stood in front of a leaky utility sink not knowing whether you need a new cartridge or a whole new faucet, a laundry faucet diagram is the single fastest way to get your answer. It’s the exploded-view drawing — sometimes called a parts breakdown or schematic — that lays out every component of a laundry (utility) faucet in order, with each piece labeled. Once you can name the parts, buying the right replacement or troubleshooting a drip stops being guesswork. Below, we’ll walk through exactly what the diagram shows, how to read it, how it differs from a kitchen or bathroom faucet, and how to use it to either fix what you have or choose the right iVIGA laundry faucet the first time.
What is a laundry faucet, and how is it different from a kitchen faucet?
A laundry faucet is a utility faucet built for a laundry room, garage, basement, or mudroom sink — designed for durability and high flow rather than looks. The biggest practical differences from a kitchen faucet are the higher, more aggressive spout arc, the frequent presence of a threaded spout tip (so you can screw on a hose adapter), and simpler, tougher internal parts meant to survive detergent, bleach, mop buckets, and pet baths.
Most laundry faucets fall into a few families: a two-handle deck-mount that sits on a countertop or utility tub, a two-handle wall-mount with 4-inch or 8-inch spread, and single-handle utility models. Because laundry tubs come in so many configurations, a diagram matters more here than almost anywhere else in the house — the mounting style and hole spacing vary wildly, and a faucet that’s perfect for one tub won’t even bolt onto another.
What parts does a laundry faucet diagram actually label?
A good laundry faucet diagram labels roughly a dozen parts, working from the top of the spout down to the water supply connections. Knowing these names is what turns “it’s dripping somewhere” into “I need a 1/4-turn ceramic cartridge for the hot side.”
Here’s what you’ll see on a typical exploded view, top to bottom:
- Spout — the arched tube water flows out of; on laundry models it’s often taller and may have a threaded tip.
- Aerator or hose adapter — the screw-in tip at the spout’s mouth that mixes air into the stream or accepts a garden-hose thread.
- Handle(s) — the lever or cross knob you turn; two-handle models have separate hot and cold.
- Handle screw and index cap — the small screw (often hidden under the red/blue button) that holds each handle on.
- Bonnet nut / retaining nut — threads down over the cartridge to hold it in place.
- Cartridge or stem — the heart of the faucet; controls flow and temperature. This is what wears out and drips.
- O-rings and washers / seals — small rubber rings that stop leaks around moving parts.
- Faucet body — the main casting that everything mounts into.
- Escutcheon / deck plate — the base plate that covers the mounting holes.
- Mounting nuts and washers — clamp the faucet to the sink deck or wall from below.
- Supply-line inlets — the threaded shanks (commonly 1/2-inch) where your hot and cold supply lines connect.
How do you read a laundry faucet diagram to find the right replacement part?
Read it in three quick steps: locate the part that’s failing, note its position number and name on the diagram, then match that number to the parts list (the legend) that comes with the diagram to get the exact part or kit number. Manufacturers key every labeled callout to a corresponding part number, so a “drip from the spout” traces directly to the cartridge or seat washer listed for that model.
In practice, start with the symptom. A drip from the spout tip almost always means a worn cartridge or seat washer. Water seeping around the base of a handle points to a handle O-ring or bonnet seal. A weak, sputtering stream is usually a clogged aerator — the cheapest fix on the whole diagram. Leaking underneath the sink means a supply-inlet connection or the mounting seal, not the faucet’s guts at all. Once you’ve localized it on the diagram, you know whether you need a $6 washer, a $15 cartridge, or nothing but a wrench to tighten a nut. If the issue turns out to be a loose faucet rather than a worn part, our guide on the kitchen faucet tightening tool you actually need walks through the exact basin wrench and steps that apply to laundry faucets too.
One tip that saves a wasted trip: bring the old part to the store, or photograph the diagram with the part number visible. Cartridges especially look nearly identical across brands but are not interchangeable — a 2 mm difference in length or a different spline count means it won’t seat.
Which laundry faucet type matches your sink? A quick comparison
The right type comes down to how your sink is drilled and where the supply lines come out of the wall. Use the diagram of any faucet you’re considering to confirm its mounting style and inlet spacing match your setup before you buy — this is the single most common reason a laundry faucet gets returned.
| Faucet type | Mounting | Typical hole spacing | Best for | Threaded spout for hose? |
|---|---|---|---|---|
| Two-handle deck-mount | Sits on tub/countertop deck | 4″ centerset or 8″ widespread | Standard utility tubs and drop-in laundry sinks | Often yes |
| Two-handle wall-mount | Bolts to wall, supply from wall | Usually 8″ (adjustable 7.5″–8.5″) | Basements and garages with wall stub-outs | Usually yes |
| Single-handle deck-mount | Single or 3-hole deck | Single hole (or 4″ with deck plate) | Quick one-hand operation, modern look | Sometimes |
| Utility/service faucet | Wall-mount, exposed | Fixed 8″ cross-body | Heavy-duty commercial-style use | Almost always |
If your supply lines come straight out of the wall, you need a wall-mount model, and getting the rough-in spacing right is critical — the same logic covered in our walkthrough on how to replace a wall-mounted tap without calling a plumber applies directly to laundry setups. For deck-mount tubs, measure your hole spacing center-to-center and match it to the diagram’s dimension callouts.
How do you use a laundry faucet diagram to replace a worn cartridge? (Step by step)
You use the diagram as your disassembly map — take the faucet apart in the reverse order the parts are stacked in the drawing, and reassemble in the order shown. A cartridge swap on a laundry faucet takes about 20–30 minutes and needs only an adjustable wrench, a screwdriver, and pliers.
- Shut off the water at the hot and cold supply valves under or behind the sink, then open the faucet to release pressure.
- Pop off the index cap (the red/blue button) on the leaking handle and remove the handle screw shown in the diagram.
- Lift off the handle and unthread the bonnet/retaining nut with your wrench.
- Pull the old cartridge straight up. Note its orientation — many are keyed, and the diagram shows which way the tab faces.
- Drop in the new cartridge (matched by part number from the diagram legend), reseat the bonnet nut, and reinstall the handle and cap.
- Turn the water back on slowly and check for drips. If the spout still weeps, the seat washer beneath the cartridge may also need replacing.
If your drip is at the spout rather than the handle, our step-by-step on how to fix a faucet drip before it wastes another gallon covers the seat-and-spring and washer fixes in more detail, and the same parts logic carries over to laundry faucets.
What’s the difference between a laundry faucet diagram and an outdoor or kitchen one?
The core structure is the same — spout, control, seals, mounting, inlets — but the emphasis differs. A laundry faucet diagram highlights the threaded/hose-adapter spout and heavy-duty two-handle stems, an outdoor faucet (hose bib) diagram centers on the anti-siphon vacuum breaker and packing nut, and a kitchen faucet diagram usually adds a pull-down sprayer hose, weight, and diverter. If you also maintain an outside spigot, the companion breakdown in our outdoor faucet diagram guide shows exactly how those extra freeze-protection and backflow parts change the picture.
The upshot: don’t assume parts cross over between rooms. A laundry cartridge and an outdoor bib stem may look cousinly on paper but serve different pressures and duty cycles. Always match the diagram to the specific faucet family you own.
Common laundry faucet problems and what the diagram tells you
Most laundry faucet complaints map to just four spots on the diagram. Here’s the quick translation from symptom to part:
- Constant drip from the spout → worn cartridge or seat washer (center of the diagram).
- Leak around a handle base → handle O-ring or bonnet seal.
- Weak or spitting stream → clogged aerator/hose adapter at the spout tip; unscrew and rinse it.
- Puddle under the sink → loose supply-inlet nut or failed mounting seal, not the faucet’s internals.
Low pressure that a clean aerator doesn’t fix can also point to sediment in the cartridge or a partially closed supply valve — the same diagnosis process laid out in our deep dive on kitchen faucet low water pressure and how to restore the flow. Because laundry rooms often sit at the end of a long or older supply run, sediment buildup is especially common there.
How do you know a new laundry faucet will fit before you buy it?
Compare four numbers from the product’s diagram to your existing setup: spout height and reach, mounting hole spacing (center-to-center), number of deck holes, and supply-inlet thread size. If all four match, it fits. iVIGA lists these dimensions on every laundry and utility faucet spec sheet precisely so you can check against your sink without measuring blind.
Measure your sink first: count the holes, measure the spread between the outer two, and check whether your supply lines are 1/2-inch (the most common). Then read the candidate faucet’s diagram. A widespread 8-inch model will not fit a 4-inch centerset sink, and a deck-mount won’t work where supply lines exit the wall. Getting this right up front is the whole point of the diagram — it’s a fit-check tool as much as a repair tool.
FAQ
Where can I find the exact diagram for my specific laundry faucet?
Look for the model number stamped on the faucet body, under the spout, or on the original box, then search the manufacturer’s site or the printed installation sheet that came with it. For iVIGA faucets, the exploded diagram and parts list ship inside the box and are available on the product page at www.viga.cc. If you’ve lost the model number, matching your faucet’s handle style and mounting type against a generic diagram will still get you to the right part family.
Are laundry faucet cartridges universal?
No. Cartridges vary by length, spline count, and how they’re keyed into the body, so they are not interchangeable across brands or even always within a single brand’s lineup. Always match the part number from your faucet’s diagram or bring the old cartridge with you. This is the number-one reason DIY cartridge swaps fail on the first try.
Can I put a garden hose on my laundry faucet?
Often yes — many laundry faucets have a threaded spout tip or come with a hose adapter, both of which the diagram will label at the spout’s mouth. If your spout has a standard aerator instead, you can usually unscrew it and add a threaded hose adapter. Check the diagram to confirm your spout tip is threaded before buying an adapter.
What size are laundry faucet supply connections?
The most common supply-inlet thread on residential laundry faucets is 1/2-inch, connecting to standard braided supply lines. The diagram’s inlet callout will specify the exact thread. If you’re also sizing tub or shower connections elsewhere, the method in our guide on bathtub faucet thread size and how to measure it uses the same measure-and-match approach.
Should I repair my laundry faucet or replace the whole thing?
Repair if the problem is a single worn part — a cartridge, washer, O-ring, or aerator — since those cost a few dollars and take under half an hour. Replace the whole faucet if the body is cracked, corroded, or if you’ve already replaced the cartridge and it still leaks, which usually means the seat is worn beyond the washer’s ability to seal. As a rule of thumb, if repair parts cost more than half the price of a new faucet, replace it.
Author note: This guide was written by the iVIGA product team, drawing on hands-on testing of our own utility and laundry faucet lines. iVIGA has manufactured brass and stainless faucets for the global market for over a decade, and every faucet we ship is pressure- and flow-tested and backed by our manufacturer warranty. Our diagrams follow standard exploded-view conventions so parts are identifiable regardless of which brand you currently own. For guidance on which faucet materials last longest in hard-use settings like laundry rooms, see our comparison of brass vs stainless steel faucet manufacturing.
WeChat
Scan the QR Code with WeChat