 iVIGA Faucet Manufacturer & Factory

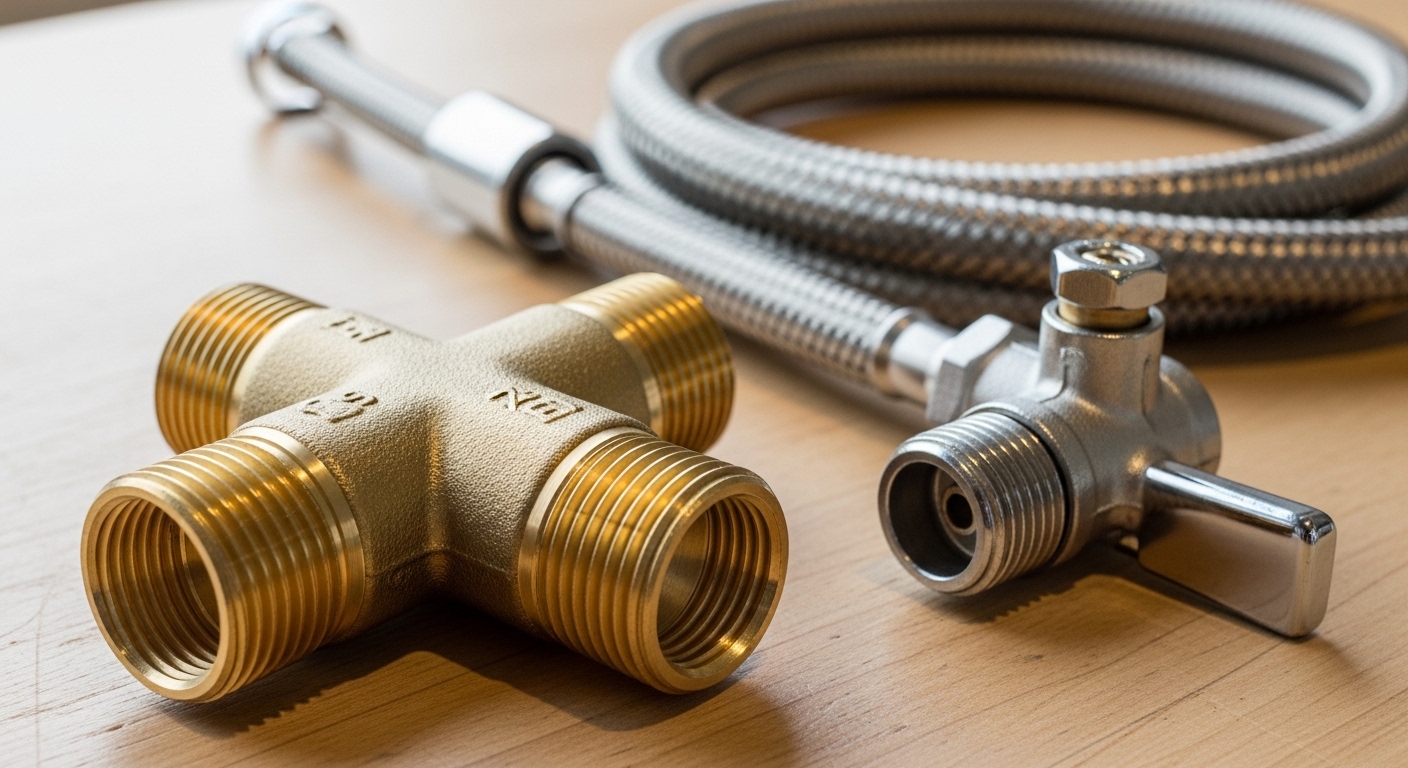
If you’ve ever wanted to add a bidet attachment, a reverse-osmosis filter, or a second faucet without tearing open a wall, a faucet supply line tee is the $8–$25 part that makes it possible. It’s a simple three-way fitting that taps into the water line already feeding your faucet and gives you a second outlet. Below, we’ll walk through what it is, the sizes and materials that actually matter, how to choose the right one for your exact setup, and the mistakes that cause leaks — in plain language, from people who make and test these fittings for a living.
What exactly does a faucet supply line tee do?
It splits one water supply into two outlets from a single connection point. Picture the flexible hose (the “supply line”) that runs from your shut-off valve up to your faucet. A tee installs somewhere along that path — usually right at the angle stop valve — and creates a branch. Now one line still feeds your faucet at full pressure, and the second port feeds whatever else you want: a handheld bidet, an under-sink filter, an instant hot water dispenser, or a utility sprayer.
The beauty is that you don’t need to add plumbing inside the wall or install a second shut-off. The tee borrows the water that’s already there. On cold-water setups this is by far the most common DIY tap point, because the cold angle stop is easy to reach and most add-ons (bidets, filters) run on cold water.
Think of it as a Y-splitter for your plumbing, except shaped like a “T” and rated for constant household water pressure — typically 60–80 psi in a normal home, and built to hold well beyond that.
Which size faucet supply line tee do I actually need?
For most U.S. bathroom and kitchen setups, you need a tee with a 3/8″ compression inlet and outlet plus a 7/16″–1/2″ branch, or a 1/2″ FIP threaded body — but the only way to be sure is to read the threads on your existing connections. Sizing is where 90% of returns happen, so measure before you buy.
Here are the connections you’ll run into, and what they mean:
- 3/8″ compression — the outlet on most modern angle stop valves under a sink. This is the single most common faucet supply size in North American homes.
- 1/2″ compression — older or larger supply stops, sometimes on kitchen lines.
- 1/2″ FIP / MIP (NPT thread) — the tapered pipe thread on valve bodies and some wall stubs; FIP is female, MIP is male.
- 7/16″ and 1/2″ faucet-shank threads — the fittings at the top where the supply line meets the faucet tailpiece itself.
- 3/4″ garden hose thread (GHT) — shows up on some bidet and sprayer branches, so the branch outlet may use this so it can accept a hose.
The safest approach: trace the existing supply line from the wall to the faucet. Note the thread size at the shut-off valve (usually stamped or listed on the valve) and the thread on the faucet end. Your tee has to speak both languages, or you’ll need small brass adapters — which are fine, but each extra joint is one more place a leak can start. If you’re already unsure which threaded piece you’re dealing with, our guide to bathroom faucet nuts and which one you actually need breaks down the common thread types you’ll see under a sink.
Compression vs. push-fit vs. threaded: which connection type is best?
For a permanent, no-fuss install, threaded (FIP) or compression tees are the most reliable; push-fit tees are the fastest and best for renters or tool-free jobs. There’s no single “best” — it depends on how permanent the install is and how comfortable you are with a wrench. Here’s how the three main styles stack up.
| Connection type | How it seals | Best for | Tools needed | Watch out for |
|---|---|---|---|---|
| Compression tee | Brass ferrule (olive) compresses onto tube | Permanent installs on copper/rigid tube | Two wrenches | Over-tightening cracks the ferrule; single-use once seated |
| Threaded (FIP/MIP) tee | Tapered pipe threads + PTFE tape or dope | Valve bodies, pipe stubs, permanent work | Wrench, thread tape | Cross-threading; needs 4–6 wraps of tape |
| Push-fit tee | Internal O-ring + grip ring, hand-pushed | Renters, quick bidet/filter add-ons, PEX | None (tool-free) | Tube must be cut clean and square; pricier per fitting |
| Quick-connect faucet tee | Threads inline between valve and supply hose | DIY bidet & filter kits (3/8″ x 3/8″ x 3/8″ or 7/8″) | Hand-tight + quarter turn | Match the shank thread exactly (7/16″ vs 1/2″) |
If you’re adding a bidet, most kits ship with a quick-connect “T-adapter” already sized to the standard 7/8″–14 faucet shank or 3/8″ compression, so you rarely have to source the tee separately. But if you’re building a custom setup — say a filter and a sprayer off one line — a solid brass threaded or compression tee gives you the most durable, leak-resistant joint. For a deeper look at one popular add-on, see our breakdown of what a faucet bidet nozzle is and whether it’s worth adding.
What material should a faucet supply line tee be made of?
Choose lead-free brass or 304/316 stainless steel for anything carrying drinking water — skip cheap zinc alloy and unbranded plastic. Material is not the place to save two dollars, because a tee sits under constant pressure, often out of sight, for years.
Here’s what each material means in practice:
- Lead-free brass — the industry standard. Look for “lead-free” that complies with the U.S. Safe Drinking Water Act (≤0.25% weighted lead on wetted surfaces). Corrosion-resistant, strong threads, handles hot and cold. This is what we recommend for 95% of installs.
- 304 / 316 stainless steel — excellent corrosion resistance and a clean look if the tee is visible. 316 is best for hard water or coastal humidity. Slightly pricier.
- Chrome-plated brass — brass underneath, chrome on top for looks; fine when the fitting is exposed.
- Zinc alloy / pot metal — avoid. It’s cheap and it looks like brass, but it corrodes and cracks under pressure over time. A common cause of the slow drips people blame on the valve.
- Plastic (acetal/POM) — acceptable in reputable push-fit and bidet kits where it’s engineered and tested, but be wary of no-name plastic tees.
Hard water is worth a special mention. Mineral-heavy water accelerates buildup inside fittings and around threads, which is one more reason to favor brass or stainless over soft alloys. If limescale is already a problem in your home, our guide on the best hard water cleaner for a faucet with stubborn lime buildup is a useful companion read once your tee is installed.
How do I install a faucet supply line tee without leaks?
Shut off the water, drain the line, wrap the threads, hand-tighten, then snug a quarter to half turn with a wrench — and test under pressure before you walk away. The whole job takes 15–30 minutes for a cold-water tap. Here’s the reliable sequence.
- Turn off the angle stop valve under the sink (turn clockwise until snug). If there’s no local stop, shut off the main.
- Open the faucet to relieve pressure and drain residual water. Put a towel and a small bowl under the connection.
- Disconnect the existing supply line from the valve or faucet shank with an adjustable wrench, backing up the valve with a second wrench so you don’t twist it in the wall.
- Wrap the male threads with 4–6 clockwise turns of PTFE (plumber’s) tape. Skip tape on compression joints and on faucet-shank rubber-gasket connections — those seal by the ferrule or gasket, not the threads.
- Thread the tee on hand-tight, then snug it a quarter to half turn with the wrench. Don’t gorilla it — over-tightening is the number-one cause of cracked ferrules and stripped threads.
- Reconnect your faucet supply line to one outlet and your new fixture’s line to the branch outlet.
- Turn the water back on slowly and watch every joint for 60 seconds. Then dry each joint with a paper towel and check again after a few minutes — a slow weep won’t show up instantly.
Comfortable with under-sink work already? The same wrench discipline applies whether you’re adding a tee or doing a full faucet swap. Our step-by-step on how to properly install a kitchen faucet without calling a plumber covers the supply-line reconnection in more detail if you want the fuller picture.
Can one faucet supply line tee run a filter and a bidet at the same time?
Yes — as long as the tee and both branches are rated for your line pressure and you don’t starve either fixture. A single cold-water line at typical 60–80 psi easily feeds a low-flow bidet and an under-sink filter together, because neither draws much volume at once. Problems only appear when you tee off too many high-demand fixtures from one small line, which can cause a noticeable pressure drop when two run simultaneously.
A few practical rules for multi-fixture setups:
- Match the branch size to the demand. A bidet and filter are low-flow; a 3/8″ branch is plenty.
- Add inline shut-offs on each branch if you want to service one fixture without shutting the whole line — many bidet tees include a built-in valve for exactly this.
- Don’t stack tees carelessly. Each added joint is another potential leak point. If you need three or more branches, consider a purpose-built manifold instead of chaining tees.
- Keep drinking-water lines lead-free end to end — the filter tee, the bidet tee, and every adapter in between.
Faucet supply line tee vs. adding a new valve: which should you choose?
A tee is the right call when you want a low-cost, reversible add-on off an existing line; a new valve (or dedicated stop) is better when the second fixture is permanent, high-demand, or needs its own independent shut-off. For a renter adding a bidet, the tee wins every time — it’s cheaper, tool-optional, and leaves no wall damage. For a homeowner plumbing a permanent pot filler or a second sink, running a dedicated line with its own stop is worth the extra effort.
Cost-wise, a quality faucet supply line tee runs about $8–$25, versus $40–$150-plus in parts and labor for a new in-wall valve. The tee also installs in under half an hour with no soldering or wall access. The trade-off is that both fixtures share one shut-off and one line’s pressure, which is fine for low-flow add-ons and not ideal for two heavy simultaneous draws.
What certifications and quality signs should I look for before buying?
Look for lead-free compliance, a recognized plumbing certification like cUPC or NSF/ANSI 372, and solid-brass or stainless construction with a stated pressure rating. These are the signals that separate a fitting that lasts a decade from one that weeps in six months.
Specifically, before you add to cart, check for:
- Lead-free certification — compliant with the U.S. federal lead-free requirement (≤0.25% weighted average lead on wetted surfaces).
- cUPC / UPC listing — meets the Uniform Plumbing Code, the standard most U.S. and Canadian jurisdictions require. Curious what that stamp really means? Read our explainer on kitchen faucet UPC certification and why it matters.
- NSF/ANSI 61 or 372 — verifies the material is safe for drinking water contact.
- Stated pressure rating — a reputable tee lists a max working pressure (commonly rated well above the 60–80 psi in a normal home).
- Solid feel and clean machined threads — a heavy, well-cut brass tee tells you a lot before you ever install it. Sharp, ragged, or crooked threads are a red flag.
FAQ
Will a faucet supply line tee reduce my water pressure?
Not noticeably for low-flow add-ons like a bidet or filter. A tee splits volume, not pressure — pressure only drops meaningfully if two high-demand fixtures draw at the same time from one small line. For typical bathroom setups running one add-on at a time, you won’t feel a difference.
What’s the difference between a 3/8″ and 1/2″ faucet supply tee?
It’s the thread and tube size of the connections. 3/8″ compression is the most common size on modern under-sink angle stops and faucet supply lines, while 1/2″ appears on older or larger supply stops and some kitchen lines. Always match the tee to the existing thread size, or use a proper brass adapter — mixing sizes without one causes leaks.
Can I install a supply line tee myself, or do I need a plumber?
Most people can install one themselves in 15–30 minutes with an adjustable wrench and PTFE tape — it’s a common DIY job that requires no soldering or wall access. If your shut-off valve is seized, corroded, or leaking on its own, that’s when it’s worth calling a plumber, since replacing an angle stop is a bigger job.
Do I need to put plumber’s tape on a supply line tee?
On tapered pipe threads (FIP/MIP), yes — 4–6 clockwise wraps of PTFE tape. On compression joints and rubber-gasket faucet-shank connections, no — those seal on the ferrule or gasket, and tape can actually interfere. Knowing which joint you have is the key to a leak-free install.
Is a brass or stainless faucet supply line tee better?
Both are excellent; lead-free brass is the go-to for most installs thanks to strong threads and corrosion resistance, while 304/316 stainless is worth the small premium in hard-water or humid coastal areas, or when the fitting is visible. Avoid zinc alloy or unbranded plastic for anything carrying drinking water.
Where should I install the tee — at the valve or at the faucet?
Most installs place the tee right at the angle stop (shut-off) valve, because it’s the easiest access point and keeps the branch fed at full line pressure. You can also tee in at the faucet shank if that’s more convenient for routing to your second fixture — just match the shank thread (often 7/16″ or 1/2″) exactly.
The bottom line
A faucet supply line tee is one of the cheapest, highest-value upgrades in a modern bathroom or kitchen: for the price of a takeout lunch, you can add a bidet, a filter, or a second sprayer without opening a wall. Get the size right, insist on lead-free brass or stainless, respect the wrench (snug, don’t crank), and test under pressure before you walk away. Do that, and a good tee will run leak-free for years.
Author’s note: This guide was written by the vigacc product team, drawing on hands-on experience specifying and pressure-testing faucet supply fittings for residential and commercial installs. vigacc designs and manufactures faucets and plumbing fixtures for global markets, and our components are built to meet cUPC and lead-free drinking-water standards, backed by our manufacturer warranty. When in doubt about your specific plumbing, confirm sizing with a licensed plumber in your area.
WeChat
Scan the QR Code with WeChat