 iVIGA Faucet Manufacturer & Factory

Learning how to properly install a kitchen faucet is one of the highest-value plumbing skills a homeowner can pick up, because a faucet swap is genuinely a beginner-friendly job that plumbers charge $150–$350 to do in under an hour. The catch is that “properly” matters: a rushed install leaves you with a wobbly faucet, a drip under the sink you won’t notice until the cabinet floor swells, or cross-threaded connections that strip. This guide walks you through the entire process the way a knowledgeable friend who’s done it a dozen times would — the right order, the exact tools, and the small details that separate a leak-free 10-year install from a callback.
What Tools and Parts Do You Actually Need Before You Start?
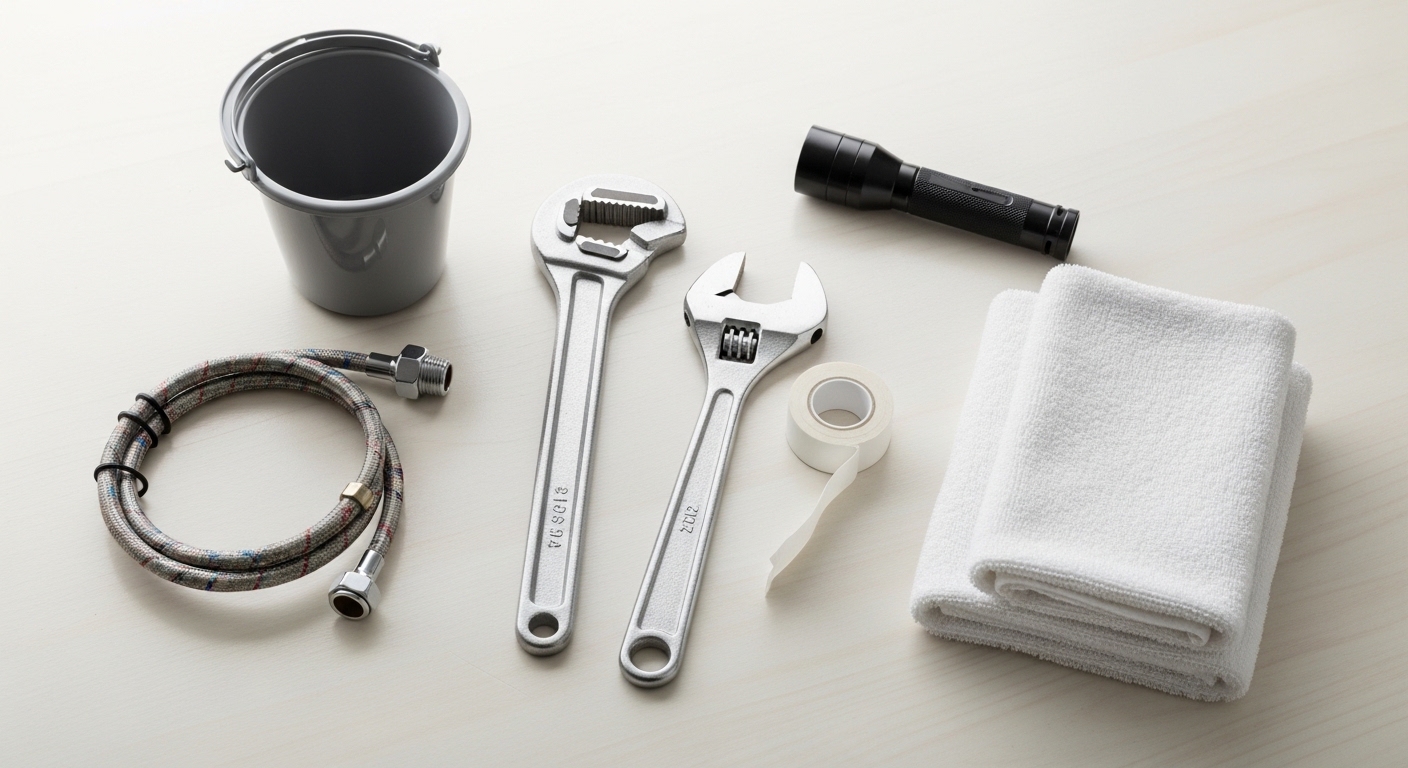
You need surprisingly little: a basin wrench, an adjustable wrench, plumber’s (PTFE) tape, a bucket, a flashlight or headlamp, and a couple of old towels. That’s the core kit for 90% of kitchen faucet installs.
The basin wrench is the one tool people skip and regret. Its swiveling, spring-loaded jaw reaches up into the cramped 2–3 inches behind the sink basin where the mounting nuts and supply-line connections live — a space no normal wrench or hand can fit. If you buy one thing for this job, buy that.
Here’s the full checklist so nothing stops you mid-project:
- Basin wrench — for mounting nuts and supply connections deep behind the sink.
- Adjustable (crescent) wrench or channel-lock pliers — for the shutoff valves and compression nuts.
- Plumber’s tape (PTFE thread-seal tape) — for any threaded metal-to-metal connection.
- New braided stainless steel supply lines — replace the old ones; they cost a few dollars and are the #1 hidden failure point.
- Bucket, towels, and a flashlight — the sink will drain leftover water, and the cabinet is dark.
- Silicone sealant or plumber’s putty — only if your faucet’s base gasket doesn’t fully seal (many modern faucets include a rubber gasket and need neither).
Before you buy the faucet itself, confirm your sink’s hole configuration. A single-hole sink can’t accept a widespread 3-hole faucet without a deck plate, and a 3-hole sink needs either a 3-hole faucet or a single-hole faucet paired with an escutcheon plate to cover the extra holes. If you’re weighing a two-handle setup, our guide to the pull down kitchen faucet with two handles breaks down which hole counts each style needs.
How Do You Remove the Old Kitchen Faucet Without Making a Mess?
Shut off the water first, then disconnect the supply lines, then unthread the mounting nuts holding the old faucet down — in that order. The single most common mistake is loosening a connection before the water is off, which turns a clean swap into a flooded cabinet.
Start by turning both shutoff valves (hot on the left, cold on the right) clockwise until they stop. Then open the old faucet all the way to release pressure and drain the lines into your bucket. If your shutoffs are seized, corroded, or you don’t have any under the sink, stop and turn off the home’s main water supply instead — and plan to add proper quarter-turn shutoff valves while you’re in there.
With the water off and drained, use your basin wrench to disconnect the supply lines from the faucet tailpieces, then loosen the mounting nuts. Decades-old nuts can be crusted with mineral buildup and mold; a shot of penetrating oil and ten minutes of patience beats forcing them. Once the nuts are off, the old faucet lifts straight up and out. Scrape off the old putty or gasket residue and clean the sink deck with a rag and a little vinegar so your new gasket seats flat. If the deck is caked in lime scale, our tips for a hard water cleaner for a faucet will get it spotless before the new unit goes down.
What’s the Correct Step-by-Step Way to Install the New Faucet?
Feed the faucet’s supply lines and mounting shank down through the sink hole, seat the base gasket, secure the mounting nut from below, then connect the water lines — bottom-up is the golden rule. You do almost all the real work from inside the cabinet, on your back, looking up.
Most modern single-hole pull-down faucets follow this exact sequence:
- Attach the base gasket or trim ring to the underside of the faucet body so it sits between the faucet and the sink deck.
- Feed the pre-attached hoses and the threaded mounting shank down through the sink hole. Position the faucet square to the sink’s front edge.
- From below, thread the mounting nut (or the horseshoe bracket) up onto the shank. Hand-tighten, double-check the faucet is still straight from above, then snug it with your basin wrench. Firm, not gorilla-tight — over-torquing cracks plastic nuts.
- Connect the pull-down hose to the spray wand and the weight if your model uses a docking magnet or counterweight. Clip the weight onto the hose at the spot the instructions specify.
- Wrap plumber’s tape clockwise 3–4 times around any exposed male threads, then connect the braided supply lines: hot to hot, cold to cold.
- Tighten supply connections hand-tight, then a quarter- to half-turn more with a wrench. These are the connections that leak when over-tightened, so err gentle and re-check.
A quick note on plumber’s tape versus putty: use PTFE tape on threaded connections and use plumber’s putty or the included rubber gasket to seal the faucet base against the deck — they’re not interchangeable. If your faucet came with a rubber or silicone base gasket (most do now), you generally don’t need putty at all.
How Do You Connect the Supply Lines and Check for Leaks the Right Way?
Connect hot-to-hot and cold-to-cold with new braided stainless supply lines, tighten to hand-tight plus a quarter-turn, then turn the water back on slowly and inspect every joint with a dry paper towel. The paper-towel trick catches weeping leaks your eye would miss — even a slow drip shows up instantly as a wet spot.
Reuse is the temptation to resist. Old supply lines have compressed washers and possibly hairline corrosion; new braided lines cost $4–$8 each and are cheap insurance against the exact failure that floods a kitchen at 2 a.m. Make sure the line length gives a gentle curve, not a sharp kink, which restricts flow and stresses the connection.
When everything’s connected:
- Remove the aerator or spray wand tip first — installing kicks loose debris and mineral flakes that can clog a fresh aerator.
- Turn both shutoff valves back on slowly, roughly a quarter-turn at a time, watching the connections below.
- Run hot and cold for 60–90 seconds to flush the lines, then reinstall the aerator.
- Check under the sink with your flashlight after 5 minutes, then again after 24 hours — some leaks only appear under sustained pressure.
If you spot a drip at a threaded joint, don’t just crank harder — back it off, add a wrap of tape, and reseat it. If a widespread or two-handle faucet ever starts dripping down the road, the fix is usually a worn cartridge, which we cover in why a widespread faucet drips and whether to repair or replace it.
Do You Need a Deck Plate, and How Do You Handle Extra Sink Holes?
You need a deck plate (escutcheon) when your sink has more holes than your new faucet uses — most often when installing a modern single-hole faucet in a sink drilled for three or four. The deck plate hides the unused holes and gives a clean, finished look.
Sinks commonly come in 1-hole, 3-hole (4-inch centerset or 8-inch widespread), and 4-hole (with an extra hole for a soap dispenser or side sprayer) configurations. Match your faucet to what you have, or bridge the gap:
| Sink Holes | Best Faucet Choice | Extra Part Needed? |
|---|---|---|
| 1 hole | Single-hole pull-down or pull-out | None |
| 3 holes, 4″ centers | Centerset or single-hole + deck plate | Deck plate if single-hole |
| 3 holes, 8″ centers | Widespread faucet | None |
| 4 holes | Single/3-hole faucet + soap dispenser or sprayer | Cap or accessory for 4th hole |
If you have leftover holes and no accessory to fill them, a matching-finish hole cap or a deck plate solves it in seconds. Whatever you choose, keep the faucet’s arc height in mind for your sink depth and window clearance — our comparison of low arc vs high arc faucets helps you avoid buying a gooseneck that won’t clear the cabinet above the sink.
How Long Does It Take, and When Should You Call a Pro Instead?
A straightforward single-hole faucet replacement takes a first-timer 45–90 minutes; call a professional if your shutoff valves are seized, your supply lines are hard-plumbed copper with no shutoffs, or you find corroded, leaking pipes when you open the cabinet. Knowing your limit here saves money and water damage both.
DIY is the right call when: you have working quarter-turn shutoff valves, flexible supply lines, and you’re replacing like-for-like. Bring in a plumber when: there are no shutoff valves at all, the existing connections are soldered copper, you’re moving the faucet to a sink that isn’t drilled for it, or you uncover rot, mold, or active leaks in the supply plumbing. There’s no shame in it — sometimes a $200 service call prevents a $5,000 cabinet-and-floor repair.
One more pre-purchase tip that saves headaches: buy a faucet that’s actually certified for potable water. Look for a UPC/cUPC or NSF/ANSI mark, which confirms the faucet is lead-free and safe for drinking water in North America. We explain exactly what to look for in our breakdown of kitchen faucet UPC certification — it’s the difference between a compliant, warrantied fixture and a gray-market unit that fails inspection.
What Are the Most Common Installation Mistakes to Avoid?
The biggest mistakes are reusing old supply lines, over-tightening plastic mounting nuts until they crack, forgetting to flush the lines before reinstalling the aerator, and skipping the base gasket. Each one is easy to avoid once you know it’s coming.
Here’s the short list of what trips people up:
- Reusing worn supply lines — replace them every time; they’re a few dollars.
- Cross-threading connections — always start every nut by hand and only reach for the wrench once it spins on freely.
- Over-torquing — snug plus a quarter-turn is the target; cranking cracks plastic and crushes washers.
- Not flushing debris — remove the aerator, run the water, then reinstall it, or you’ll get a weak, sputtering stream on day one.
- Ignoring the mounting shims — if your faucet wobbles, a thin sink hole isn’t gripping; use the included stabilizer bracket or a washer to lock it flat.
Speaking of mounting hardware, if you ever open a faucet box and aren’t sure which nut, bracket, or washer does what, our plain-English guide to bathroom faucet nuts applies to kitchen faucets too and clears up the confusion fast.
FAQ
Can I install a kitchen faucet myself with no plumbing experience?
Yes — replacing a single-hole kitchen faucet is one of the most beginner-friendly plumbing jobs, provided you have working shutoff valves and flexible supply lines. The main skill is patience in a tight space, not technical plumbing knowledge. Budget 45–90 minutes for your first one and keep the manufacturer’s instructions handy for model-specific steps.
Do I need plumber’s putty or silicone to install a kitchen faucet?
Usually not. Most modern kitchen faucets include a rubber or silicone base gasket that seals the faucet to the sink deck without any putty. Use plumber’s putty or a bead of clear silicone only if your faucet lacks a gasket or the base doesn’t sit flush. On threaded metal connections, use PTFE plumber’s tape instead of putty.
How do I stop my new kitchen faucet from leaking underneath?
First identify where it’s leaking. Drips at the braided supply connections usually mean the nut needs a slight tightening or a fresh wrap of plumber’s tape. Water pooling around the mounting shank means the base gasket isn’t seated or the mounting nut is loose. Turn the water off, back the connection off, reseal, and reconnect — don’t just crank harder, which can crack fittings.
What size supply lines do I need for a kitchen faucet?
Most kitchen faucets use 3/8-inch compression connections at the shutoff valve and either 3/8-inch or 1/2-inch at the faucet end — braided stainless lines with a 3/8-inch comp by 1/2-inch FIP fitting cover the vast majority of installs. Measure the distance from your shutoff valves to the faucet tailpieces and buy lines a few inches longer so they curve gently without kinking.
Should I replace the shutoff valves when I install a new faucet?
If your existing shutoff valves are old multi-turn valves that are stiff, weeping, or won’t fully close, replacing them with modern quarter-turn ball valves is worth doing while the cabinet is already open. Working shutoffs make every future repair a five-minute job instead of a whole-house water shutdown. If you’re not comfortable working with the supply stubs, this is a reasonable point to bring in a plumber.
How do I know if my new kitchen faucet is safe for drinking water?
Look for a UPC/cUPC certification or an NSF/ANSI 61 and 372 mark on the box or spec sheet, which confirms the faucet meets lead-free standards for potable water in the US and Canada. Reputable manufacturers list these certifications openly. Avoid uncertified faucets for any tap you’ll drink or cook from, regardless of how attractive the price is.
A Note on Expertise and Why You Can Trust This Guide
This guide is written and reviewed by the product team at vigacc, a manufacturer and exporter of kitchen and bathroom faucets based in Kaiping, China — one of the world’s largest faucet-producing regions. Every faucet we build is pressure-tested and cycle-tested against international standards, and our products carry UPC/cUPC and NSF certifications for lead-free potable water use. The installation steps above reflect the same procedures our engineers document for professional installers and homeowners alike. Our faucets ship with a manufacturer’s warranty covering drips and finish defects, because a faucet that’s properly installed should give you a decade or more of leak-free service. When in doubt, always follow the specific instructions included with your model — and if you hit corroded pipes or seized valves, call a licensed plumber.
WeChat
Scan the QR Code with WeChat