 iVIGA Faucet Manufacturer & Factory

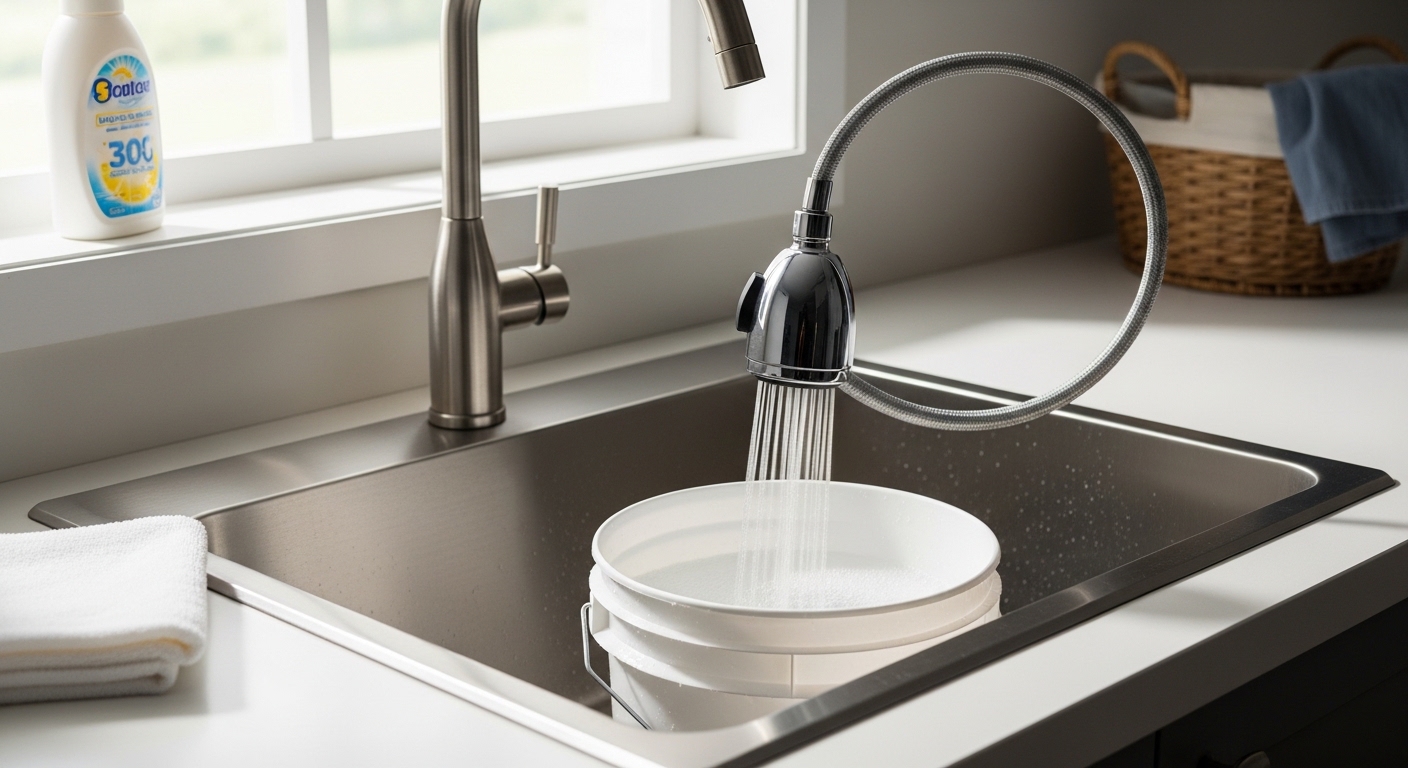
If your laundry sink faucet just dribbles straight down and you’re tired of it, a laundry faucet sprayer attachment is the cheapest upgrade that actually changes how you use the room. It turns a plain single-spout utility faucet into a flexible, high-reach sprayer — the kind that rinses a muddy jersey, fills a bucket in the corner, or hoses down the dog without soaking the floor. This guide breaks down every type, what fits your sink, real pressure and reach numbers, and how to install one in under 30 minutes.
What exactly is a laundry faucet sprayer attachment, and how does it work?
A laundry faucet sprayer attachment is any add-on that gives your utility or laundry faucet a movable spray head. It works by diverting water from the main spout — either through a threaded diverter at the aerator, a side-mounted sprayer fed by a hose, or a pull-out spout that hides the sprayer inside the spout itself.
There are three mechanical setups you’ll actually run into:
- Thread-on diverter sprayer: Unscrews your existing aerator, screws into its place (standard 15/16″–27 male or 55/64″–27 female threads), and adds a lever that flips flow between the spout and a short hand sprayer. Cheapest and fully reversible — great for renters.
- Side-spray with deck hose: A separate sprayer sits in a hole beside the faucet (or in the fourth hole of a 4-hole deck) and pulls water through a flexible hose under the sink. This is the classic “kitchen-style” sprayer adapted for utility sinks.
- Integrated pull-out / pull-down laundry faucet: The sprayer is the spout. You grip the head, pull it out on a weighted hose (18″–30″ of reach), and a button toggles stream and spray. This isn’t strictly an “attachment,” but it’s what most people upgrade to when the clamp-on version wears out.
The key spec is the diverter — a small valve that redirects water pressure. Cheap plastic diverters stick and leak within a year; a brass or ceramic diverter is what separates a $12 gadget from a $40 attachment worth buying.
Which type is best for my laundry room — clamp-on, side-spray, or pull-out?
Pick based on how permanent you want it and how much you’ll actually use the sprayer. If you rent or just need occasional rinsing, get a thread-on diverter sprayer. If you use the utility sink daily — pet baths, garden harvest, paint rollers — a pull-out laundry faucet is the better long-term buy.
Here’s a direct comparison of the three options on the specs that matter:
| Type | Price range | Reach | Install | Best for | Typical lifespan |
|---|---|---|---|---|---|
| Thread-on diverter sprayer | $18–$45 | 10–20 in (short hose) | 5 min, no tools | Renters, occasional use | 1–3 years |
| Side-spray with deck hose | $30–$70 | 24–30 in | 20–40 min, needs a deck hole | Existing 3–4 hole sinks | 4–7 years |
| Integrated pull-out faucet | $80–$180 | 18–30 in | 30–60 min, replaces faucet | Daily heavy use | 8–15 years |
One thing people miss: a clamp-on or thread-on sprayer runs at whatever pressure your existing faucet delivers, minus a little loss through the diverter. A dedicated pull-out faucet often includes a better aerator and a higher flow ceiling, so the spray feels noticeably stronger. If your current faucet is a tired builder-grade unit, no attachment will fix weak pressure — the faucet body itself is the bottleneck.
Will a sprayer attachment actually fit my existing utility faucet?
Most thread-on sprayers fit standard North American faucets, but you have to check the aerator thread size first. The two common sizes are 15/16″–27 (male, threads on the outside of the spout) and 55/64″–27 (female, threads inside). Measure or take your old aerator to the store — a mismatch is the number-one reason a sprayer attachment leaks from the connection.
Run through this quick fit checklist before you buy:
- Unscrew your current aerator by hand or with tape-wrapped pliers. If it comes off, a thread-on diverter will fit.
- Check the thread type — male vs. female. Many sprayer kits ship with a dual adapter that covers both, so look for “universal fit” on the box.
- Confirm the spout is round and unthreaded on the outside if you want a clamp-style diverter — some pull-down spouts and touchless faucets can’t accept one at all.
- Count your deck holes. A side-spray needs a spare hole (usually 1.25″–1.5″ diameter). No spare hole means you’re limited to thread-on or a full faucet swap.
- Verify supply-line reach under the sink if you’re replacing the whole faucet — laundry sinks often sit in tight cabinets or on freestanding legs.
If your faucet uses odd or worn mounting hardware, it’s worth reading up on the different faucet nuts and which one you actually need before you start unscrewing things under the sink — the wrong nut or a corroded one can turn a 20-minute job into an afternoon.
How much water pressure and reach do I really need for laundry tasks?
For laundry and utility work, aim for 1.5–2.2 GPM of flow and at least 24 inches of hose reach. That’s enough to fill a mop bucket in the sink corner, rinse a large deep basin, and direct spray into every corner without repositioning the whole bucket.
Here’s how the numbers map to real jobs:
- Rinsing hand-washed clothes: 1.5 GPM aerated spray is plenty and won’t shred delicate fabric.
- Filling buckets and watering cans: You want a stream mode near 2.2 GPM — spray mode fills slowly and splashes.
- Pet baths and boot cleaning: Reach matters more than pressure. A 24″–30″ hose lets you follow the animal or angle the boot, which a fixed spout can’t do.
- Deep utility tubs (12″+ basins): A pull-out head that reaches the bottom corners keeps sediment and detergent from pooling.
Watch the WaterSense angle too. Many modern laundry faucets cap at 1.8 GPM to meet efficiency standards, which is fine for rinsing but slower for filling. If bucket-filling speed is your priority, look for a model that lists a higher spout flow with a separate efficient aerator, or one with a pause/boost function. For a deeper look at how flow rate changes the feel of a sprayer, our guide on low-flow handheld sprayers and pressure explains the same pressure-vs-efficiency trade-off that applies to laundry heads.
How do I install a laundry faucet sprayer attachment myself?
You can install a thread-on sprayer attachment in about five minutes with no tools; a full pull-out faucet takes 30–60 minutes and one adjustable wrench. Both are genuine DIY jobs — no plumber required for either.
For a thread-on diverter sprayer:
- Turn off the faucet (you don’t need to shut off supply lines for this one).
- Unscrew the existing aerator counterclockwise. Clean any mineral scale from the spout threads.
- Wrap the spout threads with two turns of plumber’s PTFE tape.
- Screw on the diverter body hand-tight, then a quarter-turn with pliers over a cloth.
- Attach the sprayer hose to the diverter outlet, run the water, and check for drips at the joint.
For a full pull-out laundry faucet:
- Shut off both hot and cold supply valves and open the faucet to relieve pressure.
- Disconnect the supply lines and loosen the mounting nut under the deck.
- Lift out the old faucet, clean the deck, and drop in the new one over its gasket.
- Tighten the mounting nut, reconnect supply lines, and thread the sprayer hose through the spout body.
- Clip on the weight, turn the water back on, and run both modes for a full minute checking every joint.
Mineral buildup is the silent killer of any sprayer, so if you have hard water, plan to soak the head periodically. Our walkthrough on the best hard water cleaner for a faucet with stubborn lime buildup covers exactly how to keep the spray holes and diverter clear so pressure doesn’t fade after a year. And if you’re weighing a wall-mounted setup instead of a deck faucet for a garage or commercial-style laundry area, compare this against a dedicated wall mount utility faucet with sprayer, which handles heavier volume and higher splash zones.
Is a cheap sprayer attachment worth it, or should I just replace the whole faucet?
A cheap thread-on sprayer is worth it if you rent, use the sink lightly, or just want to test whether you’ll actually use a sprayer. But if you use your laundry sink several times a week, spend the $80–$180 on an integrated pull-out faucet — it pays back in durability and pressure within two years.
The math is simple. A $25 plastic-diverter attachment often fails within 12–24 months as the diverter gums up or the thin hose splits. Buy two or three of those over five years and you’ve spent as much as one solid-brass pull-out faucet that lasts a decade. The upgrade also fixes weak base pressure, gives you a real ceramic-disc cartridge (no drips), and looks like it belongs there rather than bolted on. For anyone renovating the space anyway, replacing the faucet is the clear winner. For a stopgap on an otherwise fine faucet, the attachment wins.
What finishes and build materials hold up best in a laundry room?
Chrome and brushed nickel hold up best in a laundry room because they resist the detergent splashes, bleach spots, and constant moisture that dull cheaper coatings. Under the finish, solid brass or stainless bodies outlast zinc-alloy (“pot metal”) ones by years, especially where hard water is present.
Laundry rooms are harsher than people expect — bleach, detergent, and standing humidity all attack cheap plating. A few practical rules:
- Chrome: Toughest budget finish, wipes clean, hides water spots reasonably well. The safe default.
- Brushed / satin nickel: Hides fingerprints and dried water spots best; slightly softer look.
- Stainless / PVD coatings: Most bleach- and scratch-resistant; worth it if you do a lot of chemical rinsing.
- Avoid glossy painted or thin “bronze-look” coatings in a laundry setting — bleach spatter can etch them.
Whatever finish you choose, make the internal cartridge and diverter your real priority. Ceramic-disc cartridges and brass diverters are what keep the sprayer working smoothly for years; the finish is just what you see.
A quick note on trust, testing, and warranty
One thing worth checking before you buy any laundry faucet sprayer attachment: certification. Look for products tested to NSF/ANSI 61 and 372 (for lead-free waterways) and cUPC/UPC listing, which means the valve and materials meet North American plumbing code. A reputable brand backs the faucet body and cartridge with a multi-year or limited-lifetime warranty — a signal they expect the diverter and ceramic discs to last, not fail the month after the return window closes. If a listing shows no certifications and no warranty, treat the low price as the warning it is.
FAQ
Can I add a sprayer to a laundry faucet that doesn’t have one?
Yes. The easiest way is a thread-on diverter sprayer that screws into your existing aerator threads in about five minutes — no tools and no plumbing changes. If your faucet’s aerator unscrews, you can almost certainly add a sprayer. For a spare deck hole, a side-spray with its own hose is another no-plumber option.
What size thread do most laundry faucet sprayer attachments use?
Most use one of two standard North American aerator threads: 15/16″–27 male or 55/64″–27 female. Many kits include a dual adapter that fits both. Take your old aerator to the store or measure across the spout threads before buying to avoid a leaking connection.
Why does my sprayer attachment have weak pressure?
Weak spray pressure is usually caused by mineral buildup in the spray holes or diverter, a partially closed supply valve, or a faucet body that already had low flow. Soak the head in vinegar or a lime cleaner, confirm both supply valves are fully open, and check the diverter isn’t stuck halfway. If the base faucet is old and weak, no attachment will boost it.
Do laundry sprayer attachments leak over time?
Cheap plastic-diverter models often start leaking within one to two years as the valve gums up or the thin hose cracks. A solid-brass diverter with a ceramic or rubber seal lasts far longer. To extend any sprayer’s life, clean out hard-water scale regularly and don’t over-tighten the threaded connection, which can crack the housing.
Is a pull-out laundry faucet better than a clamp-on sprayer?
For daily or heavy use, yes — a pull-out faucet gives stronger pressure, longer reach, a drip-free ceramic cartridge, and an 8–15 year lifespan versus 1–3 years for most clamp-on units. For occasional use or a rental, a clamp-on or thread-on sprayer is the smarter, reversible choice.
Can I use a laundry sprayer attachment for a pet bath or watering plants?
Absolutely — that’s one of the top reasons people add one. Look for at least 24 inches of hose reach and a stream/spray toggle. The stream mode fills watering cans fast, while the aerated spray is gentle enough for rinsing pets without startling them or shredding plant foliage.
Author note: This guide was written by the VIGA product team, drawing on years of designing and stress-testing utility and laundry faucets. VIGA (viga.cc) is a Kaiping-based faucet manufacturer supplying kitchen, bath, and utility fixtures worldwide, with products built to cUPC/UPC and lead-free NSF standards and backed by manufacturer warranties. We test diverters, cartridges, and spray heads for flow, endurance cycling, and finish durability before they ship.
WeChat
Scan the QR Code with WeChat